Appearance
Additional Functions
INFO
Note: Customers can only be viewed and deleted by organizational users who have been granted relevant permissions. Similarly, orders can only be created by organizational users who have been granted relevant permissions

Quick Link Feature:
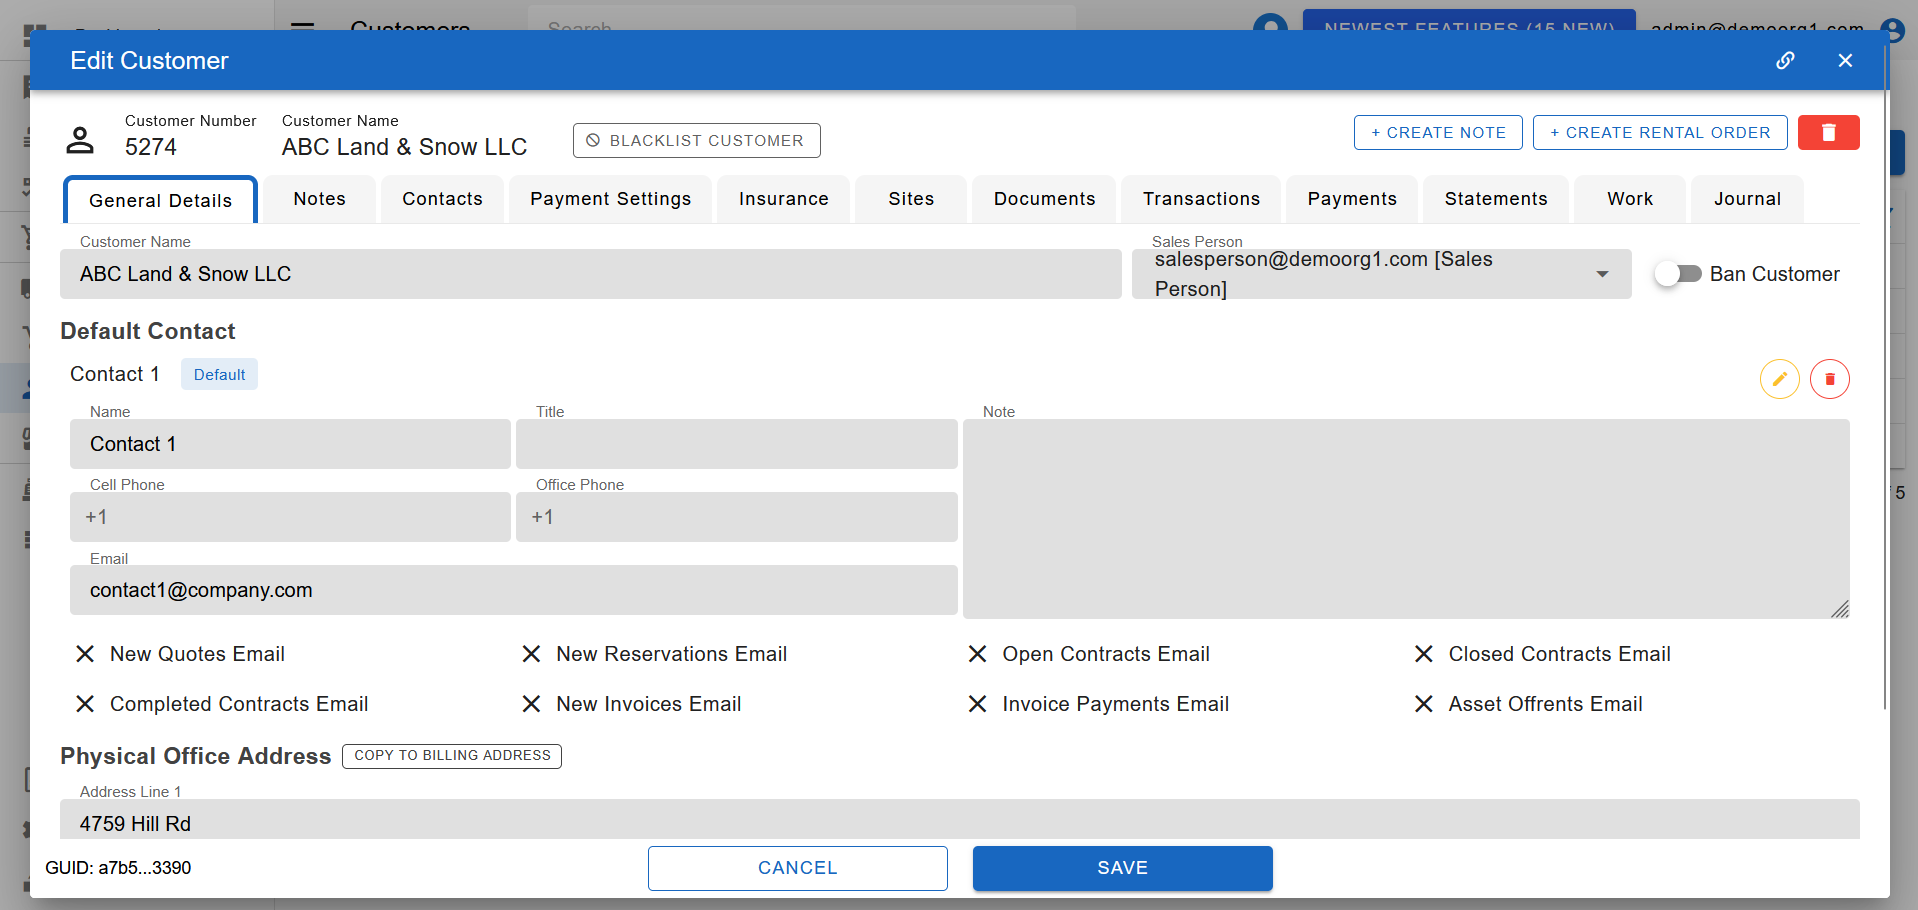
At Upper Right most of the Customers popup quick link feature is introduced. Clicking the button will copy the link against popup to clipboard.
The red button featuring a trash can icon on the top far right of the Edit Customer Popup, allows for deleting the customer. On clicking the button, the user will be prompted with a confirmation message. User can choose to proceed or abort the deletion.
The blue outlined button adjacent to the delete button top right of the Edit Customer Popup, allows for creating an order against this customer. On clicking the button, the user will be redirected to the quote creation flow.
Blacklisting A Customer
INFO
Note: The Blacklist Customer action, and the blacklist status itself, are only visible to organizational users who have been granted the relevant restricted permissions.
Blacklisting a customer is a separate, informational flag from banning — it does not block the customer from placing orders. It is intended to record customers an organization wants to be cautious of, along with a reason.
A customer can be manually blacklisted by clicking the Blacklist Customer button, next to the customer name on the Edit Customer Popup. You'll be prompted for a reason for blacklisting, which is required. Once confirmed, the popup's toolbar and the customer's info bar switch to a grey theme, and a "Blacklisted Customer" label with the provided reason appears next to the customer's name.
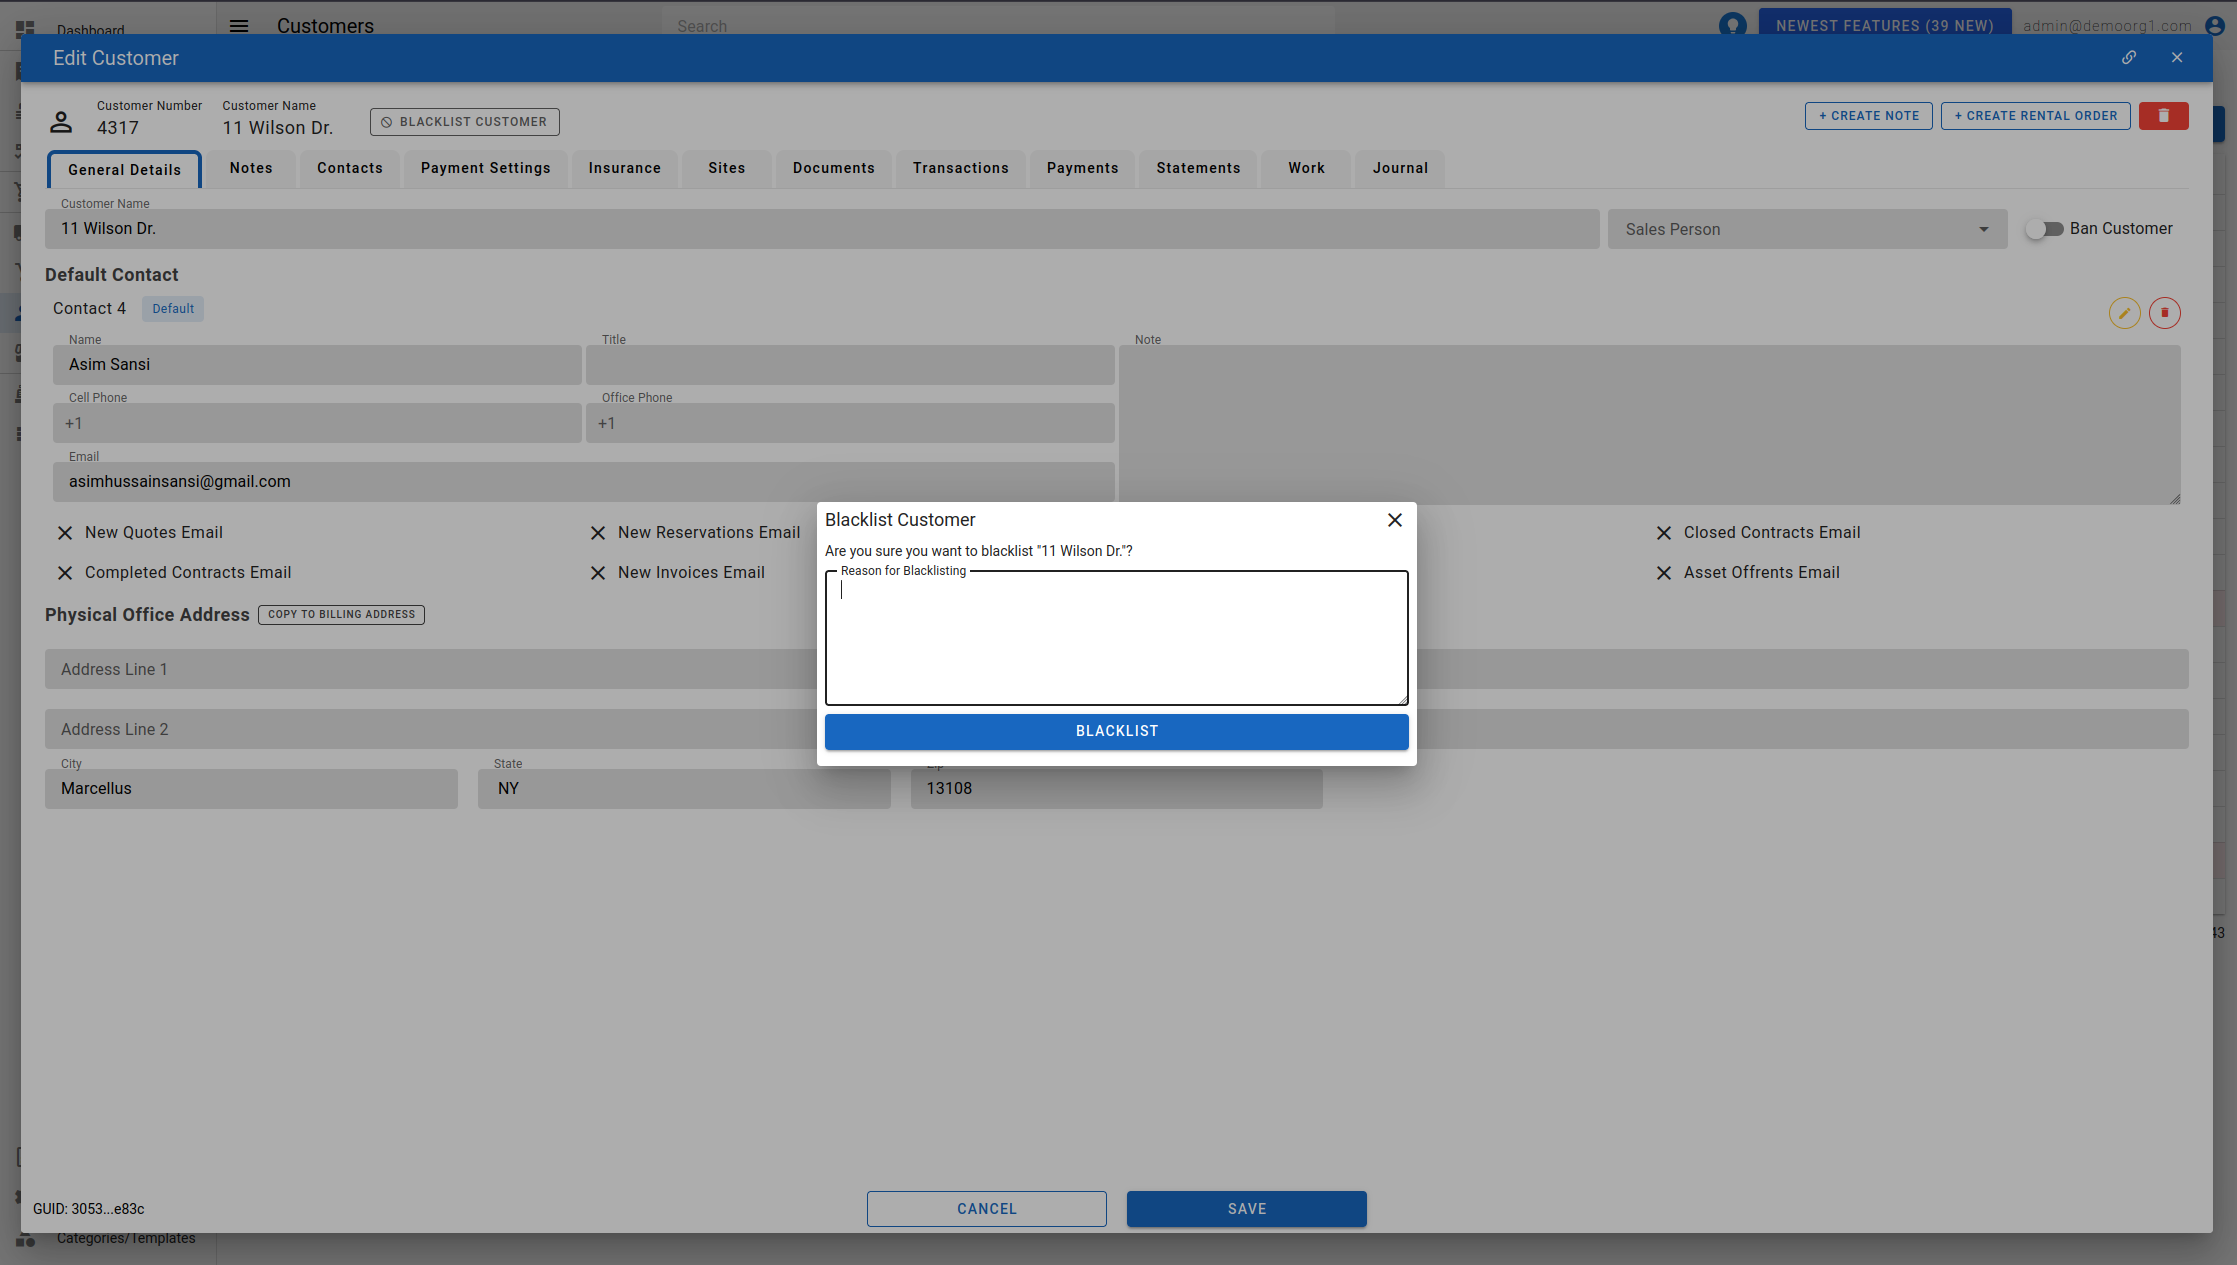
To remove a customer from the blacklist, click the restore button next to the "Blacklisted Customer" label and confirm the prompt.
A customer can also be blacklisted automatically by the system, for example after a failed pay-on-open renewal charge.
Blacklisted customers are highlighted in grey on the Customers Table, and a Blacklisted column (with the reason on hover) is available on the customers report.
The Transactions Tab features a table listing down all orders and invoices against the customer, and allows necessary modification of information on orders and invoices. The table allows filtering transactions based on type and payment status. Learn more about transaction here.
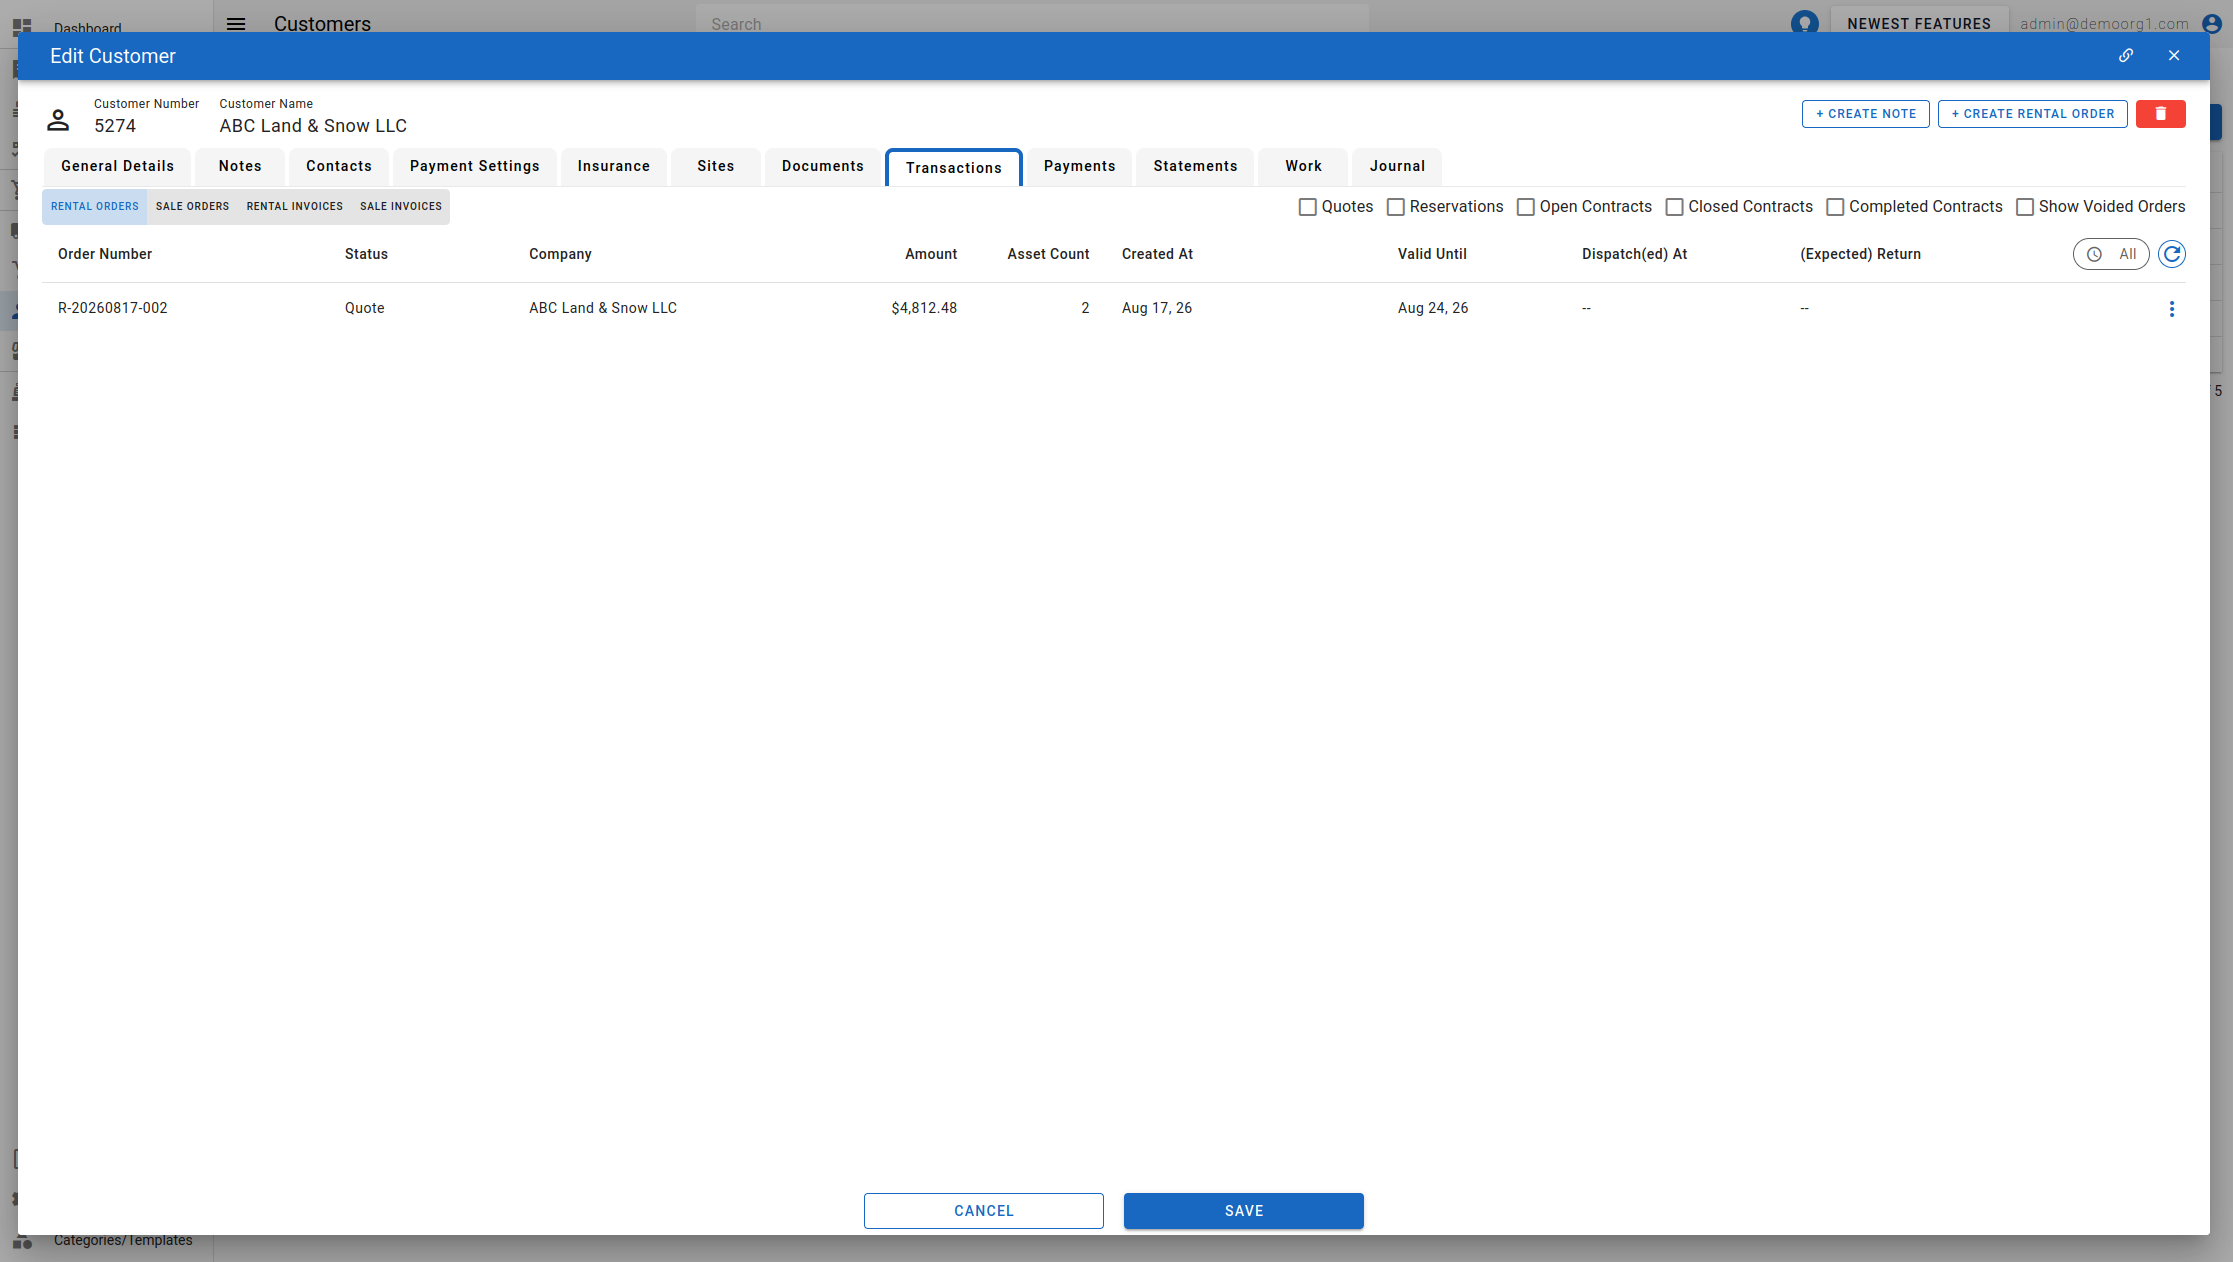
The invoice status filter now includes a Voided option, so voided invoices can be viewed alongside Unpaid, Partially Paid, and Paid invoices (sale and rental invoices share the same status filter). Deleted transactions appear with strike-through text to distinguish them.
For rental and sale orders, a few extra row actions are available from the transaction's menu when applicable:
- View Sales Analysis — on an open or closed sales order, opens the read-only sale analysis.
- View Dispatches — on a rental order past the quote stage, opens the dispatches view.
- View Signed Documents — when e-sign is enabled and the order has been signed, opens the customer's signed document (contract) in a new browser tab. Signed contracts also surface in the customer's Documents tab, so all of a customer's signed paperwork can be found in one place.
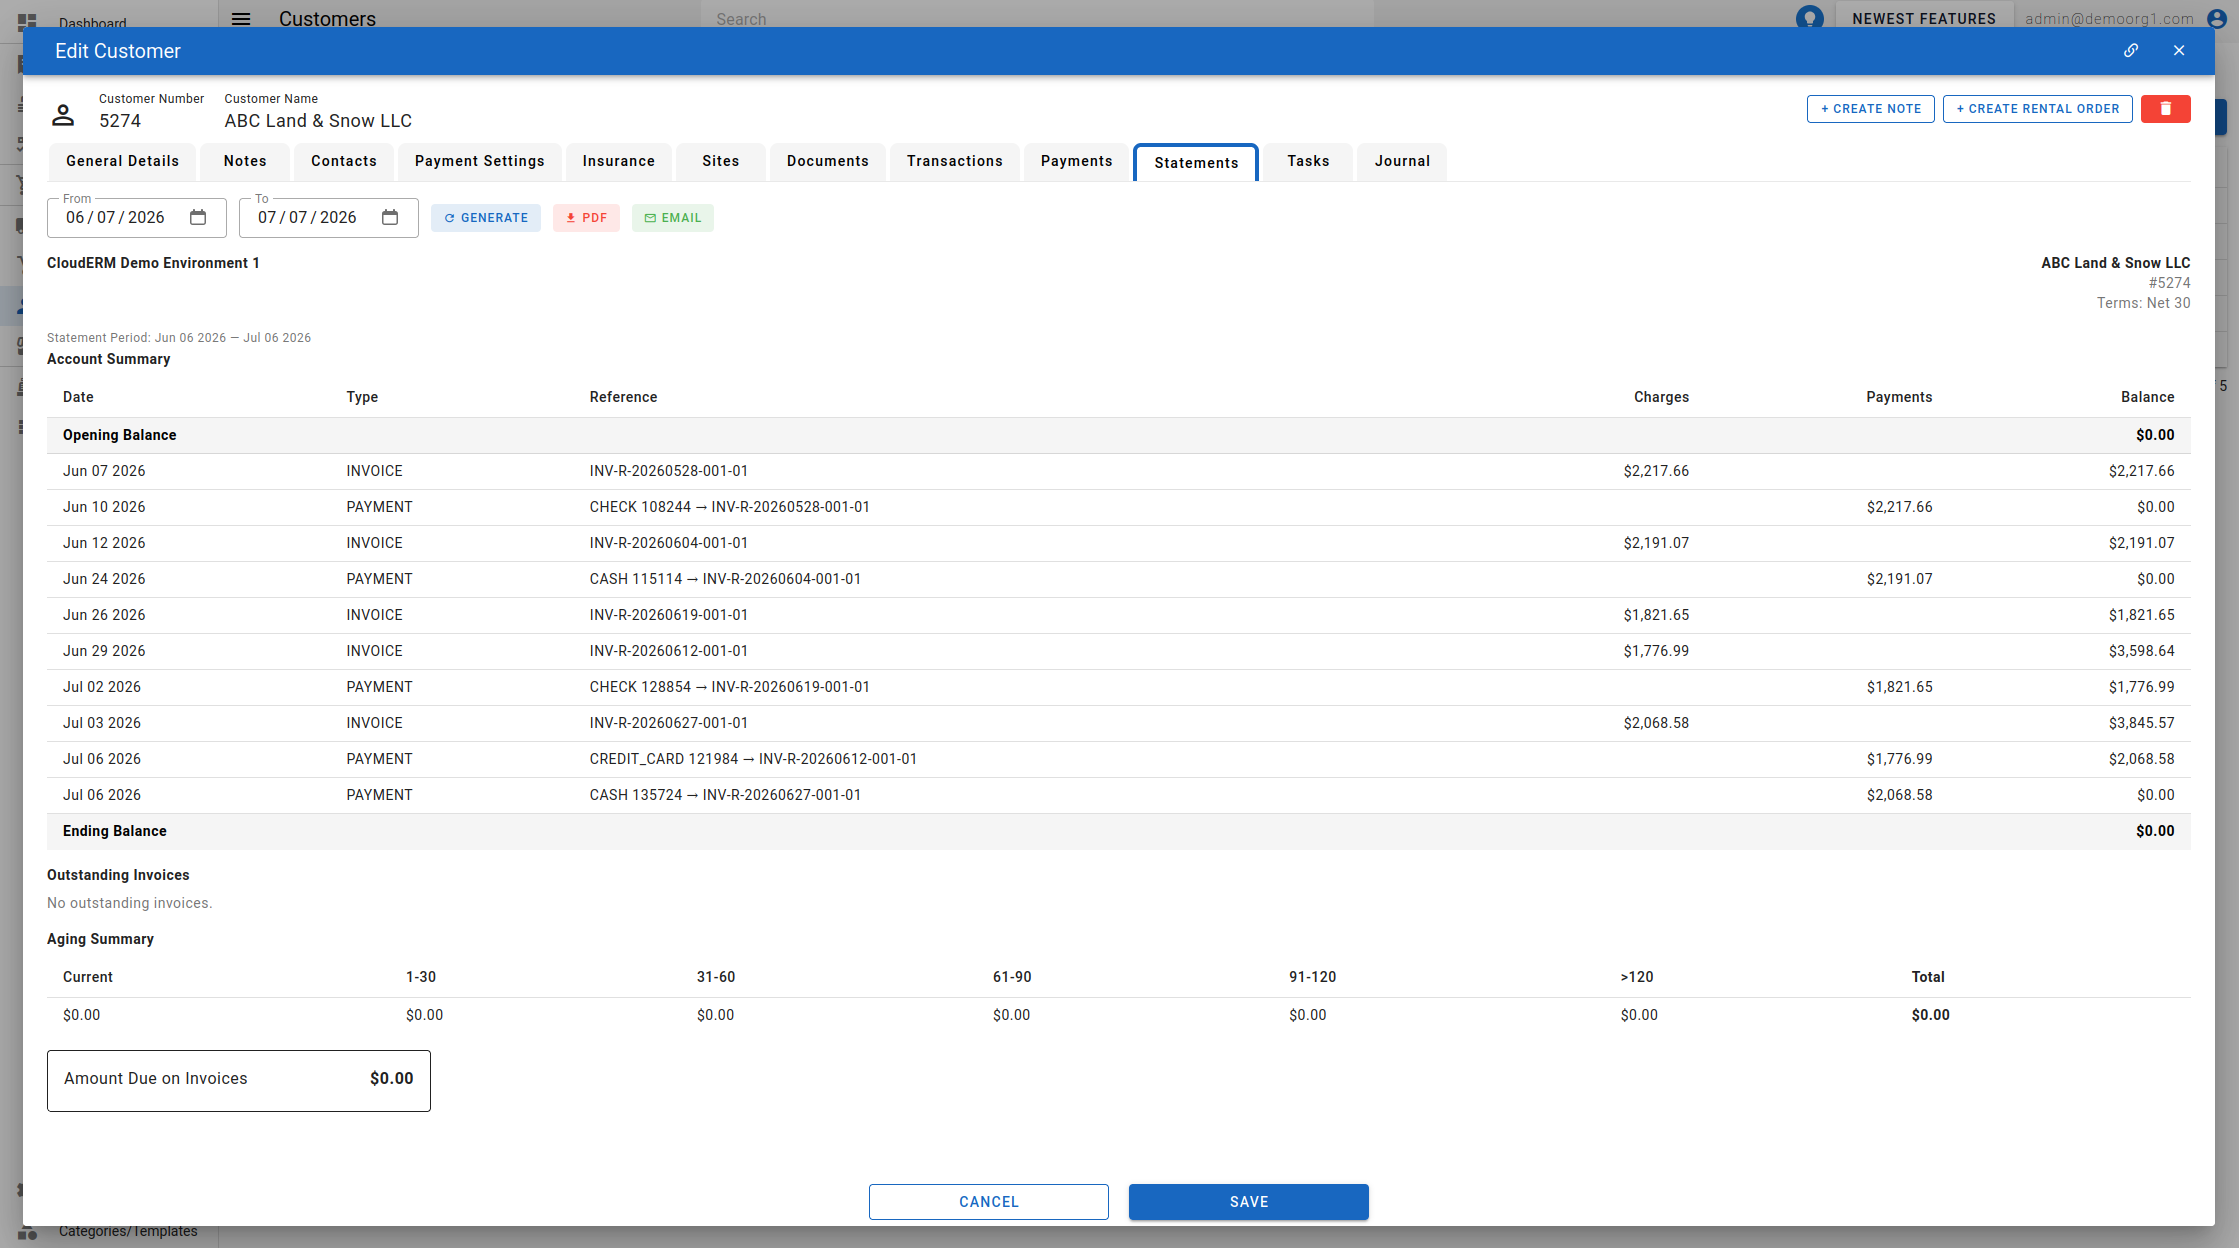
The Statements Tab generates an account statement for the customer over a chosen period. Pick a From / To date range and click Refresh to build the statement. It shows the organization and customer details, the statement period, and a running ledger — an Opening Balance followed by a row per transaction with Date, Type, Reference, Charges, Payments, and a running Balance. Use PDF to download the statement, or Email to send it to the customer's contacts (a contact receives statement emails only when its Statements Email toggle is enabled on the customer's contact (which requires a valid email address)). Imported (migrated) invoices are excluded from the statement, so it reflects only activity recorded in CloudERM.
The Journal Tab features a history of changes that have been applied to the customer's information
Restoring Customers
By default, deleted customers are not shown on the customers page. However, checking the Show Deleted Customers checkbox shows a list of all deleted customers.
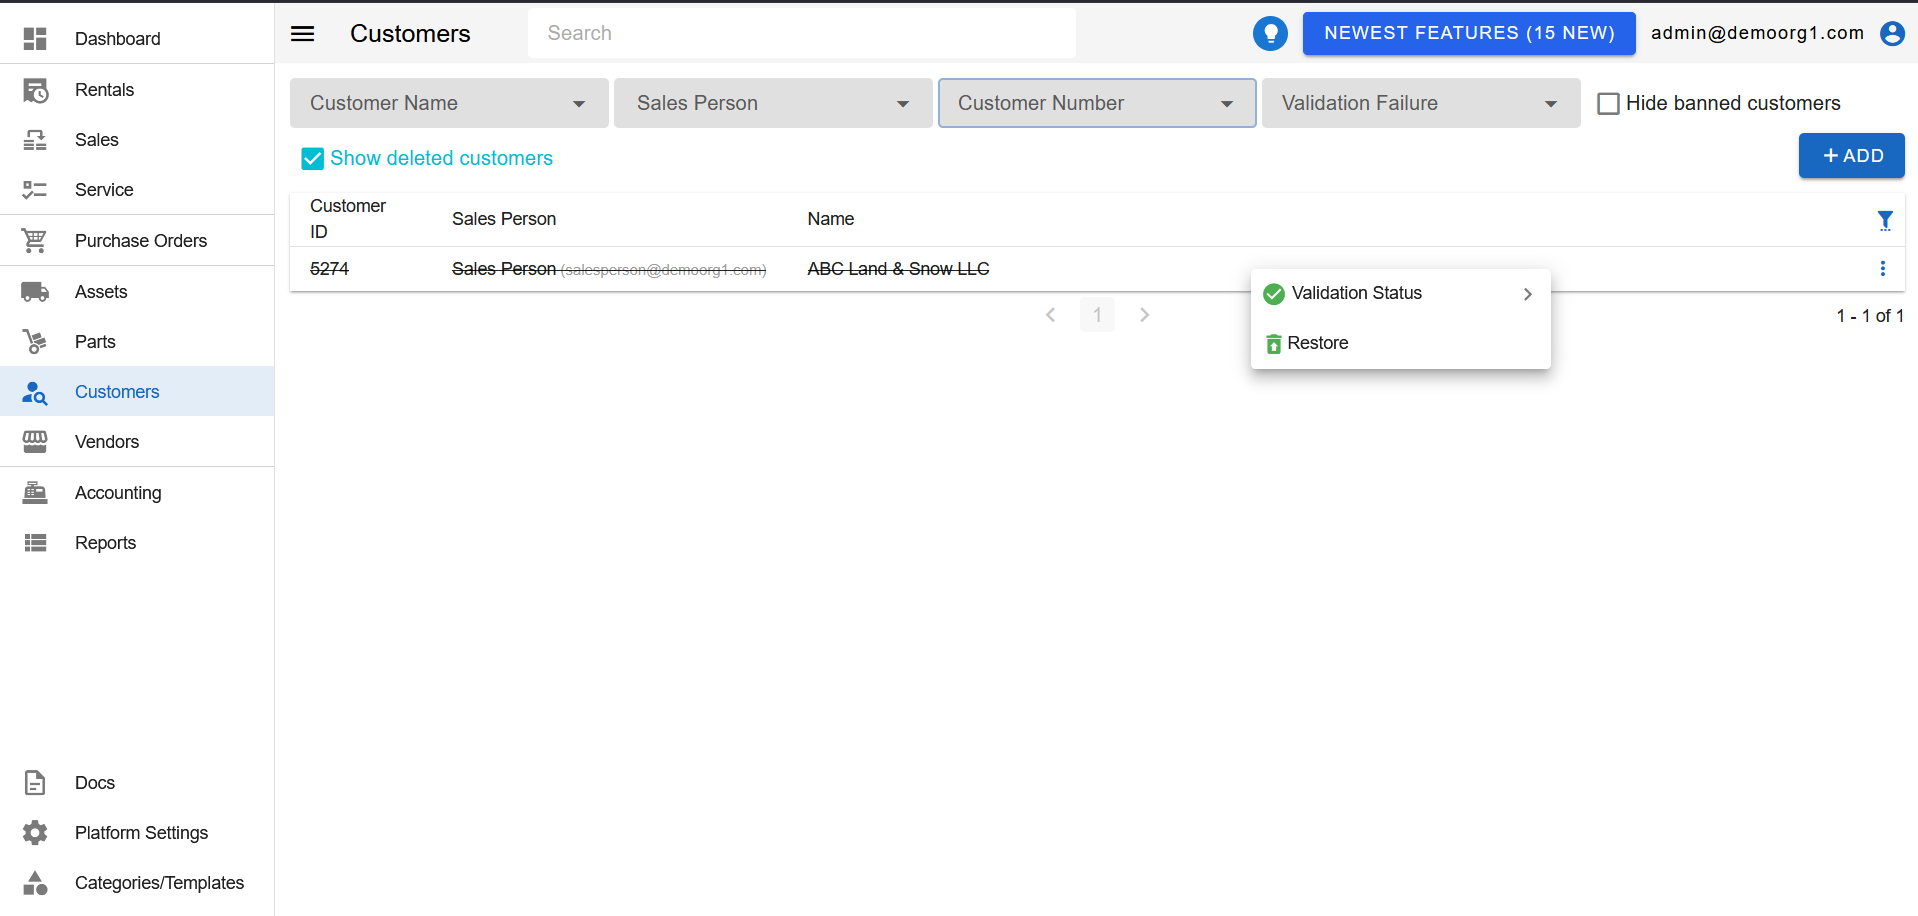
Deleted customers can be restored by clicking the green restore button on the extreme right of the customer table rows, and confirming the resultant prompt.