Appearance
Invoice Payment
Invoices generated in the sales process can either be paid automatically or manually.
If a customer has available payment methods, a default payment method selected, the auto-payment option enabled, and platform settings set to automatically approve sale invoices, then generated invoices are automatically paid through the default payment method.
Otherwise — if auto payment fails, the customer does not meet the criteria for auto payment, or platform settings disallow automatic approval — the invoice is paid manually. The invoice must first be approved; once approved, follow the steps below.
Step 1 - Open the invoice
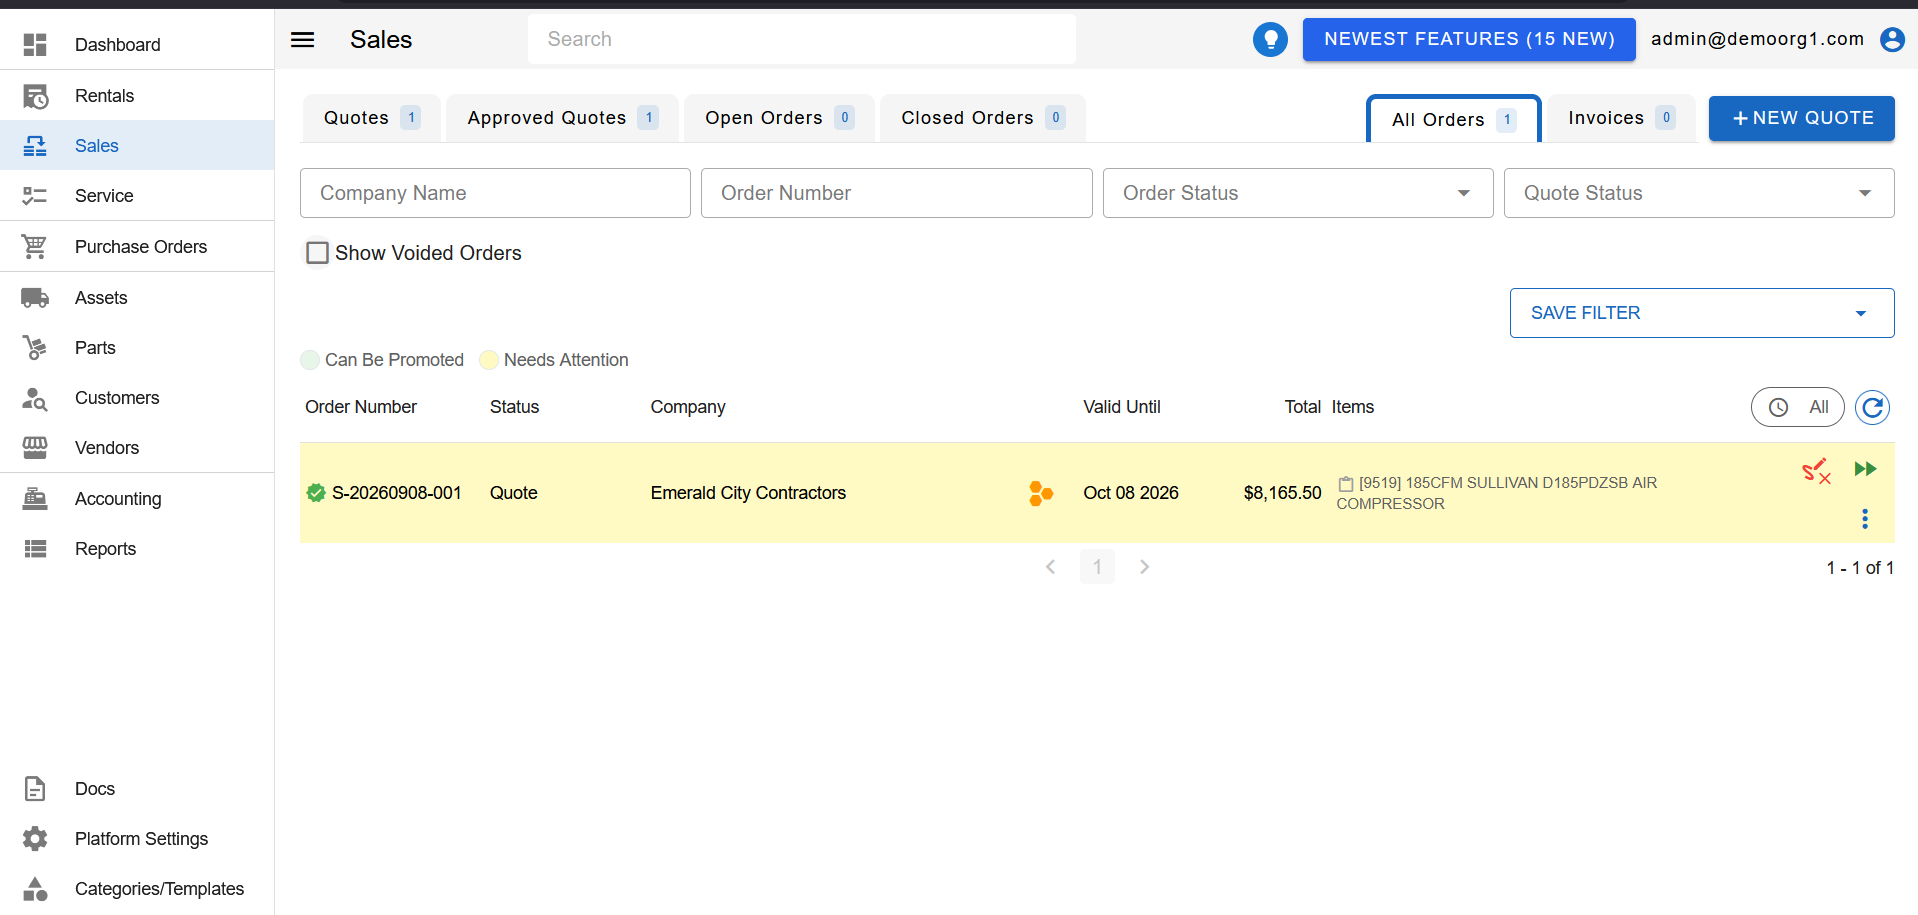
Head to the Sales page via the Left Navigation Bar and click the Invoices tab. The tab lists unpaid invoices by default.
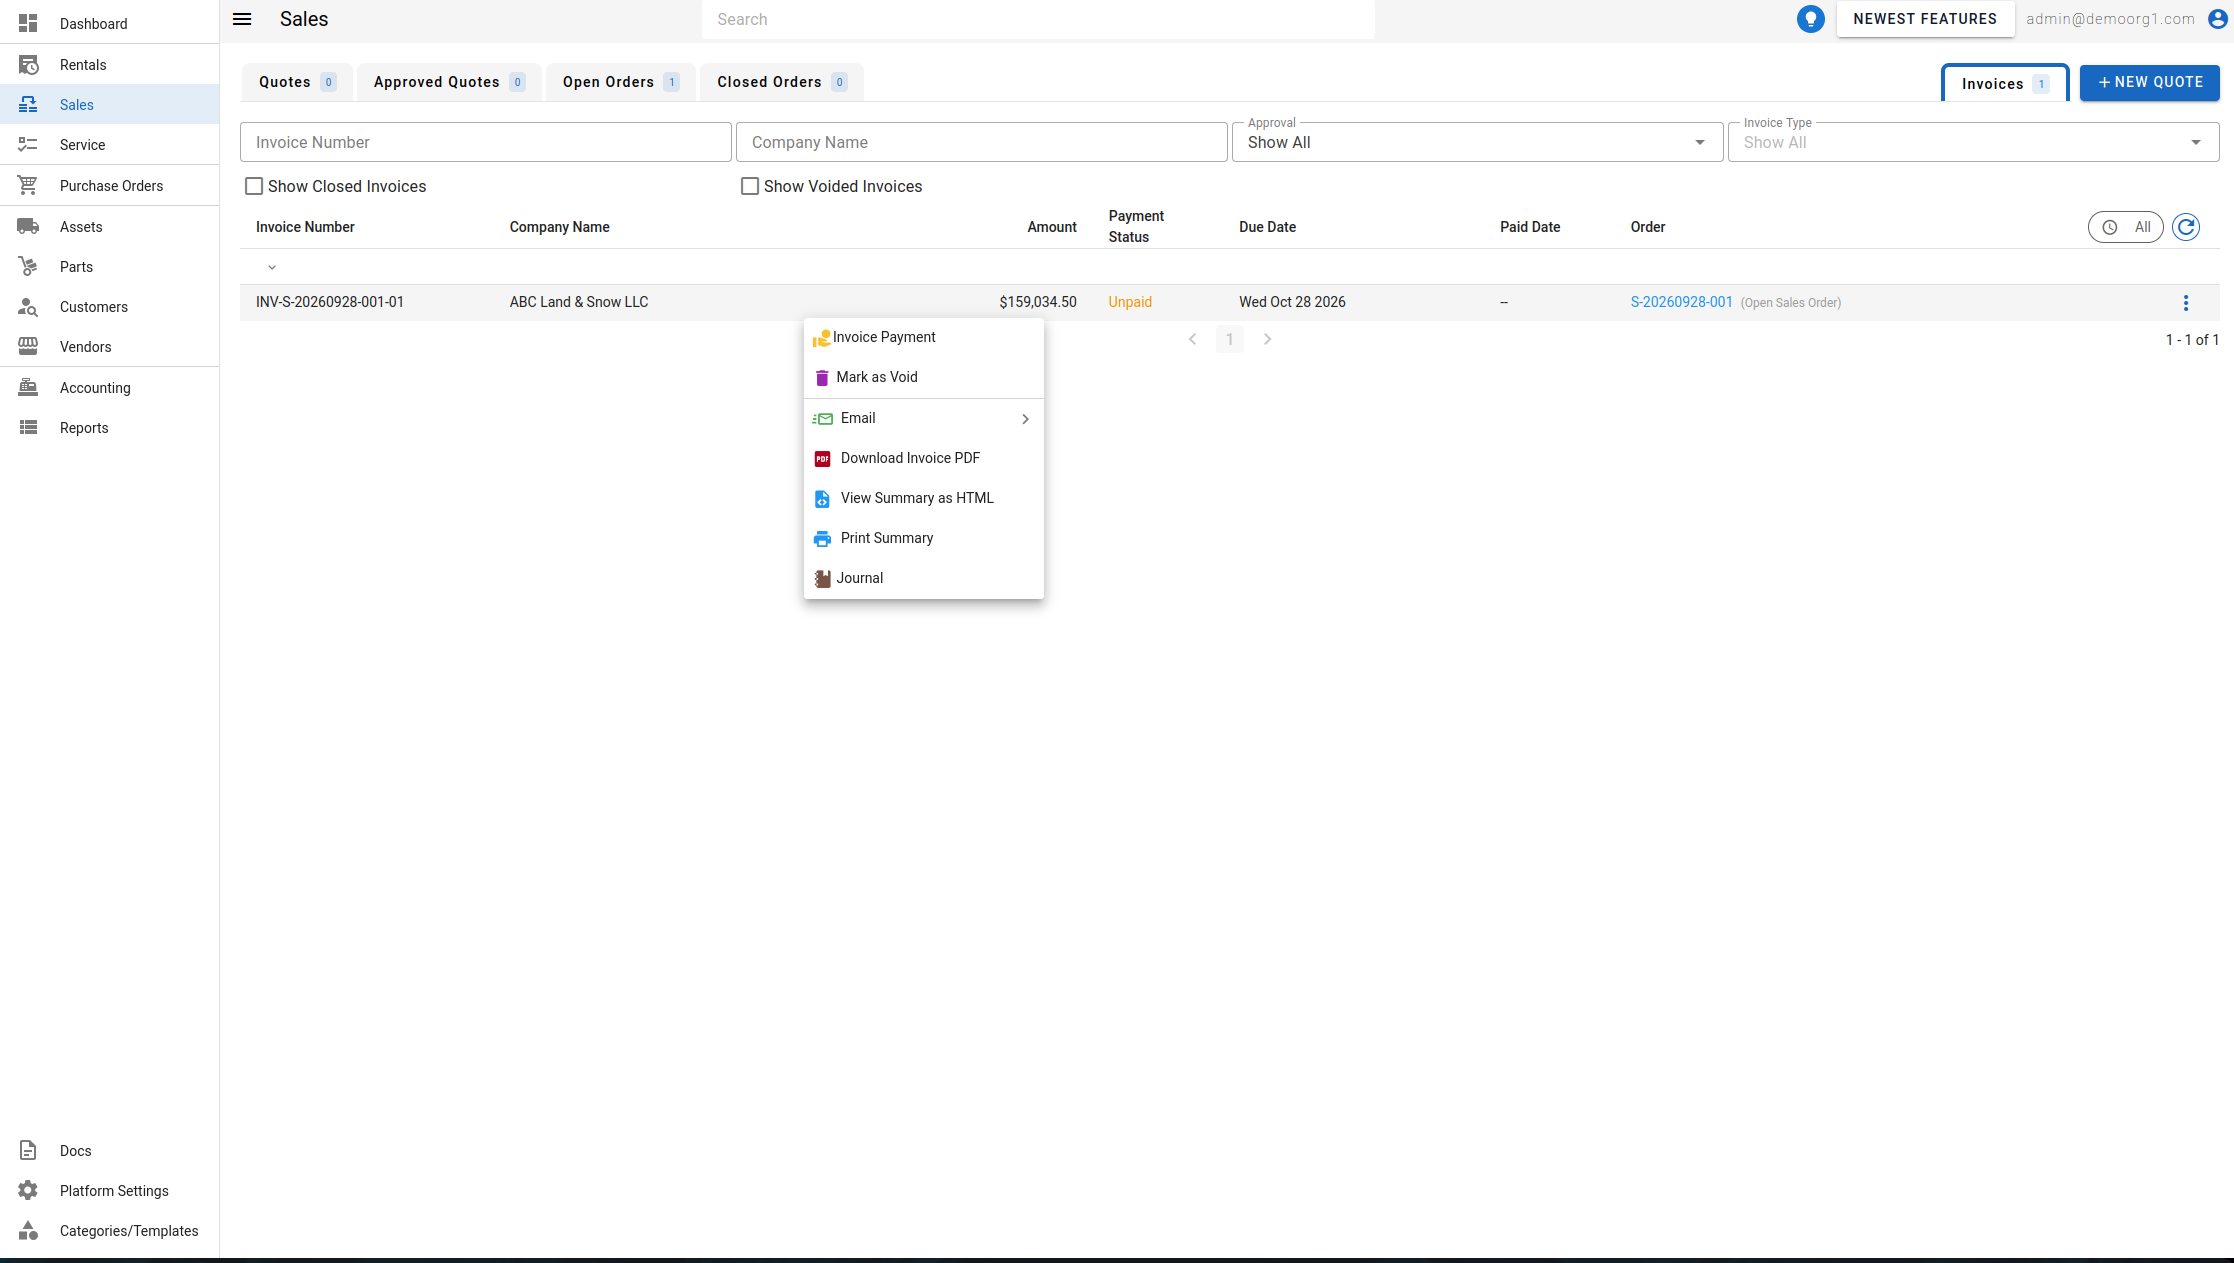
An invoice's actions are split between the row's action menu and the invoice popup:
- Right-click an invoice row to open its action menu. Depending on the invoice's state and your permissions, it offers Approve Invoice, Invoice Payment (shown as Refund Invoice for credit notes, and disabled until the invoice is approved), Mark as Void, Email, Download Invoice PDF (formerly View as PDF — now downloads the invoice PDF instead of opening it in a new tab), View as HTML, Print Summary, and Journal.
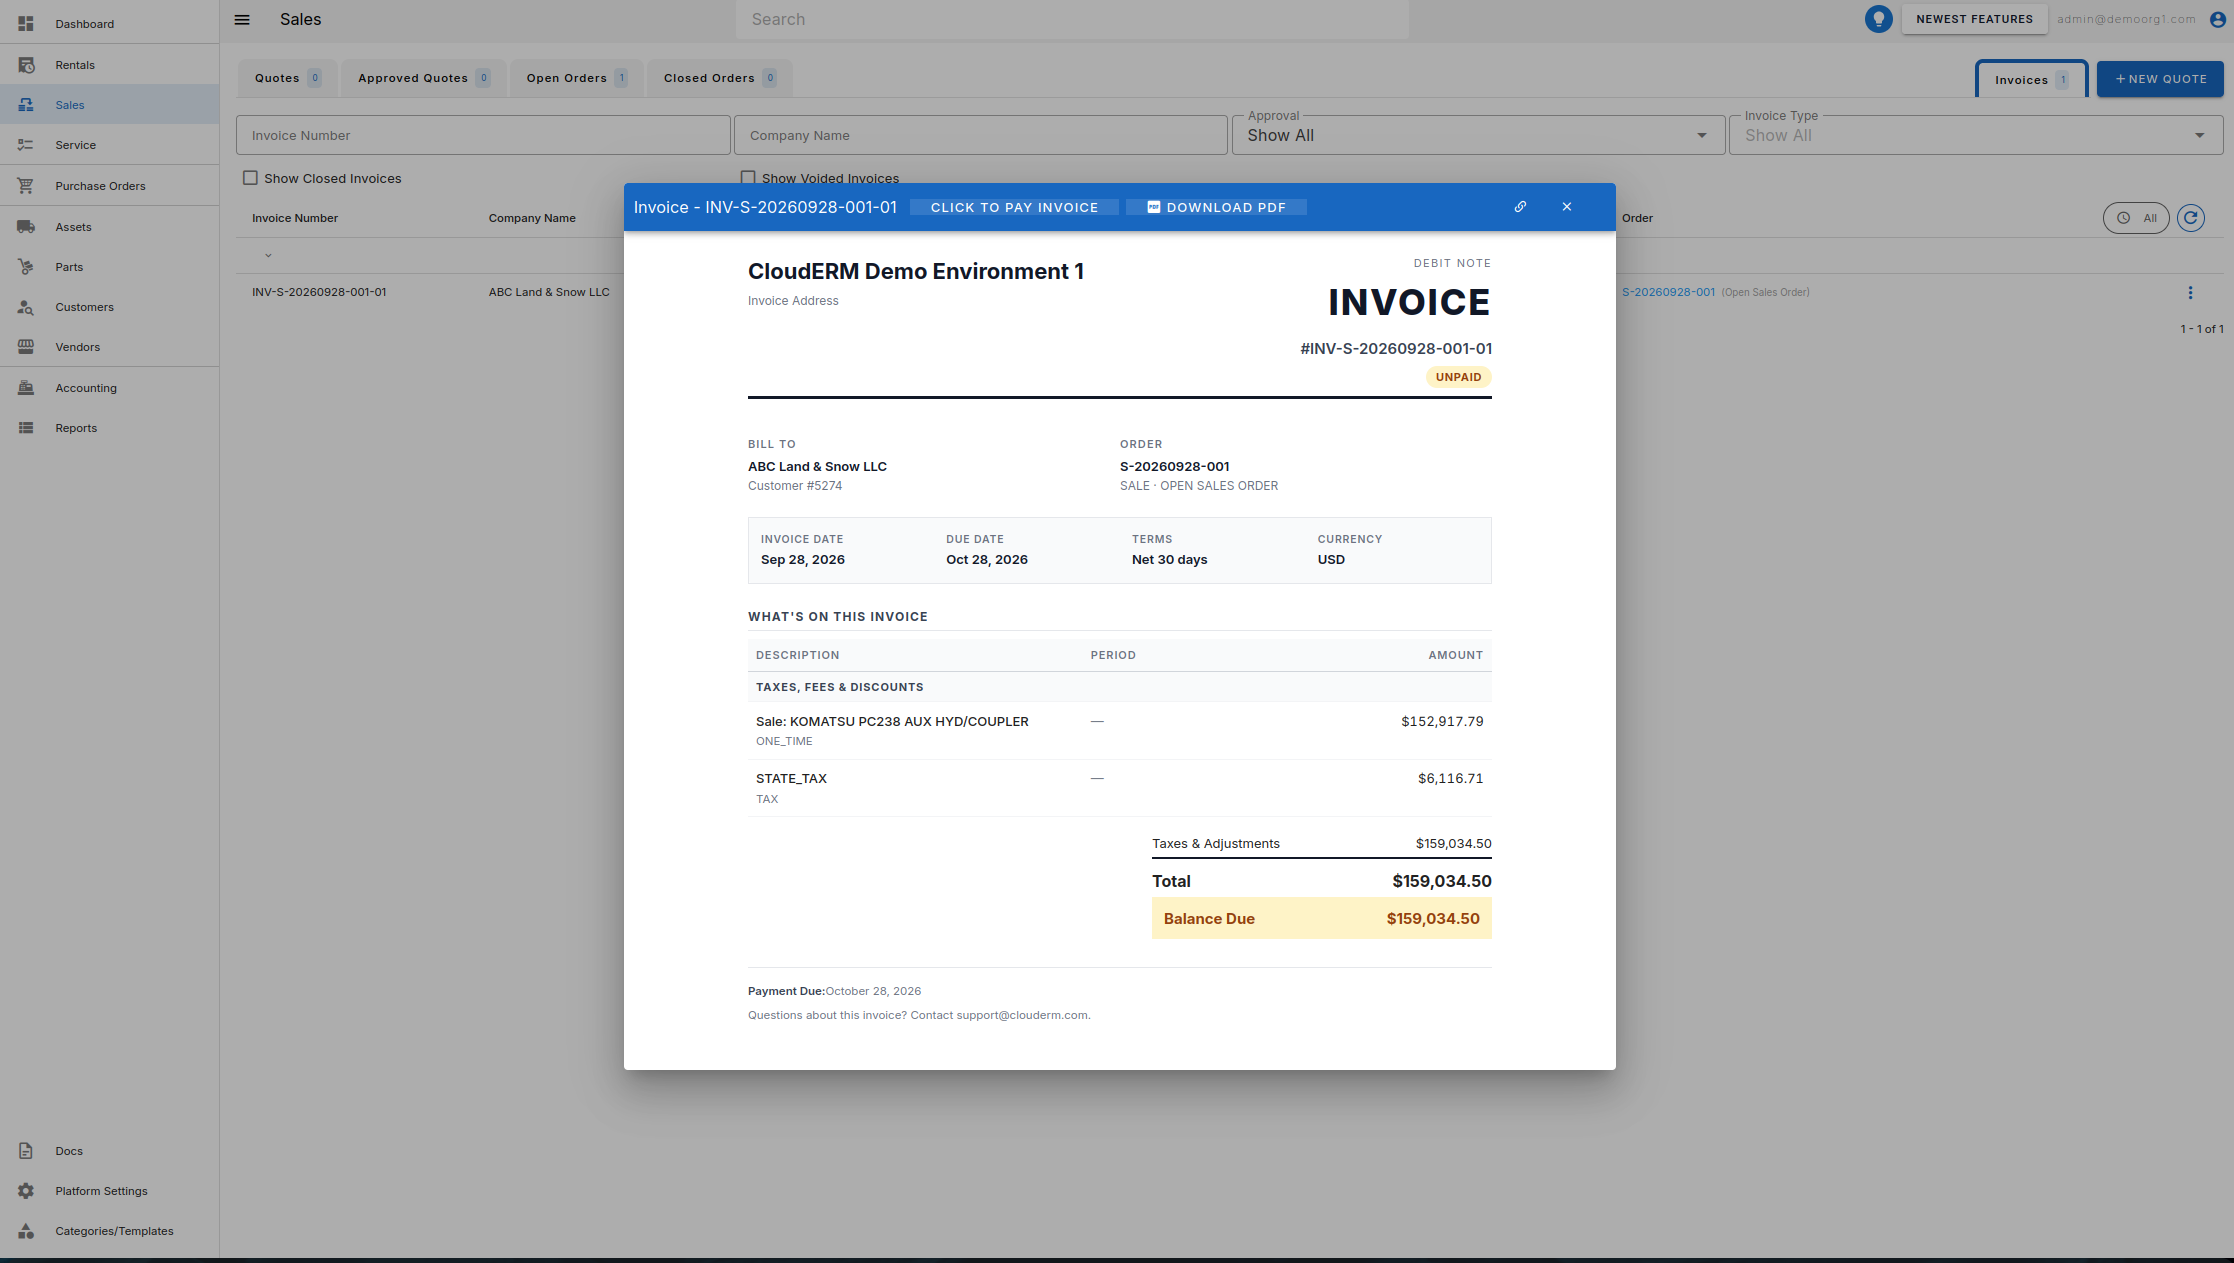
- Click an invoice row to open the invoice popup, which displays the full invoice and shows its status — for example Partially Paid, Paid, or, for an absorbed credit note, Credit — Auto-absorbed into customer balance. The popup itself has a Click to pay invoice button, a Refund button, a Download PDF button (downloads the invoice PDF sent to the customer), and — when the customer has available credit — an Apply [amount] balance button that applies that credit directly to the invoice.
INFO
Note: The invoice popup's Download PDF button requires the invoice view permission.
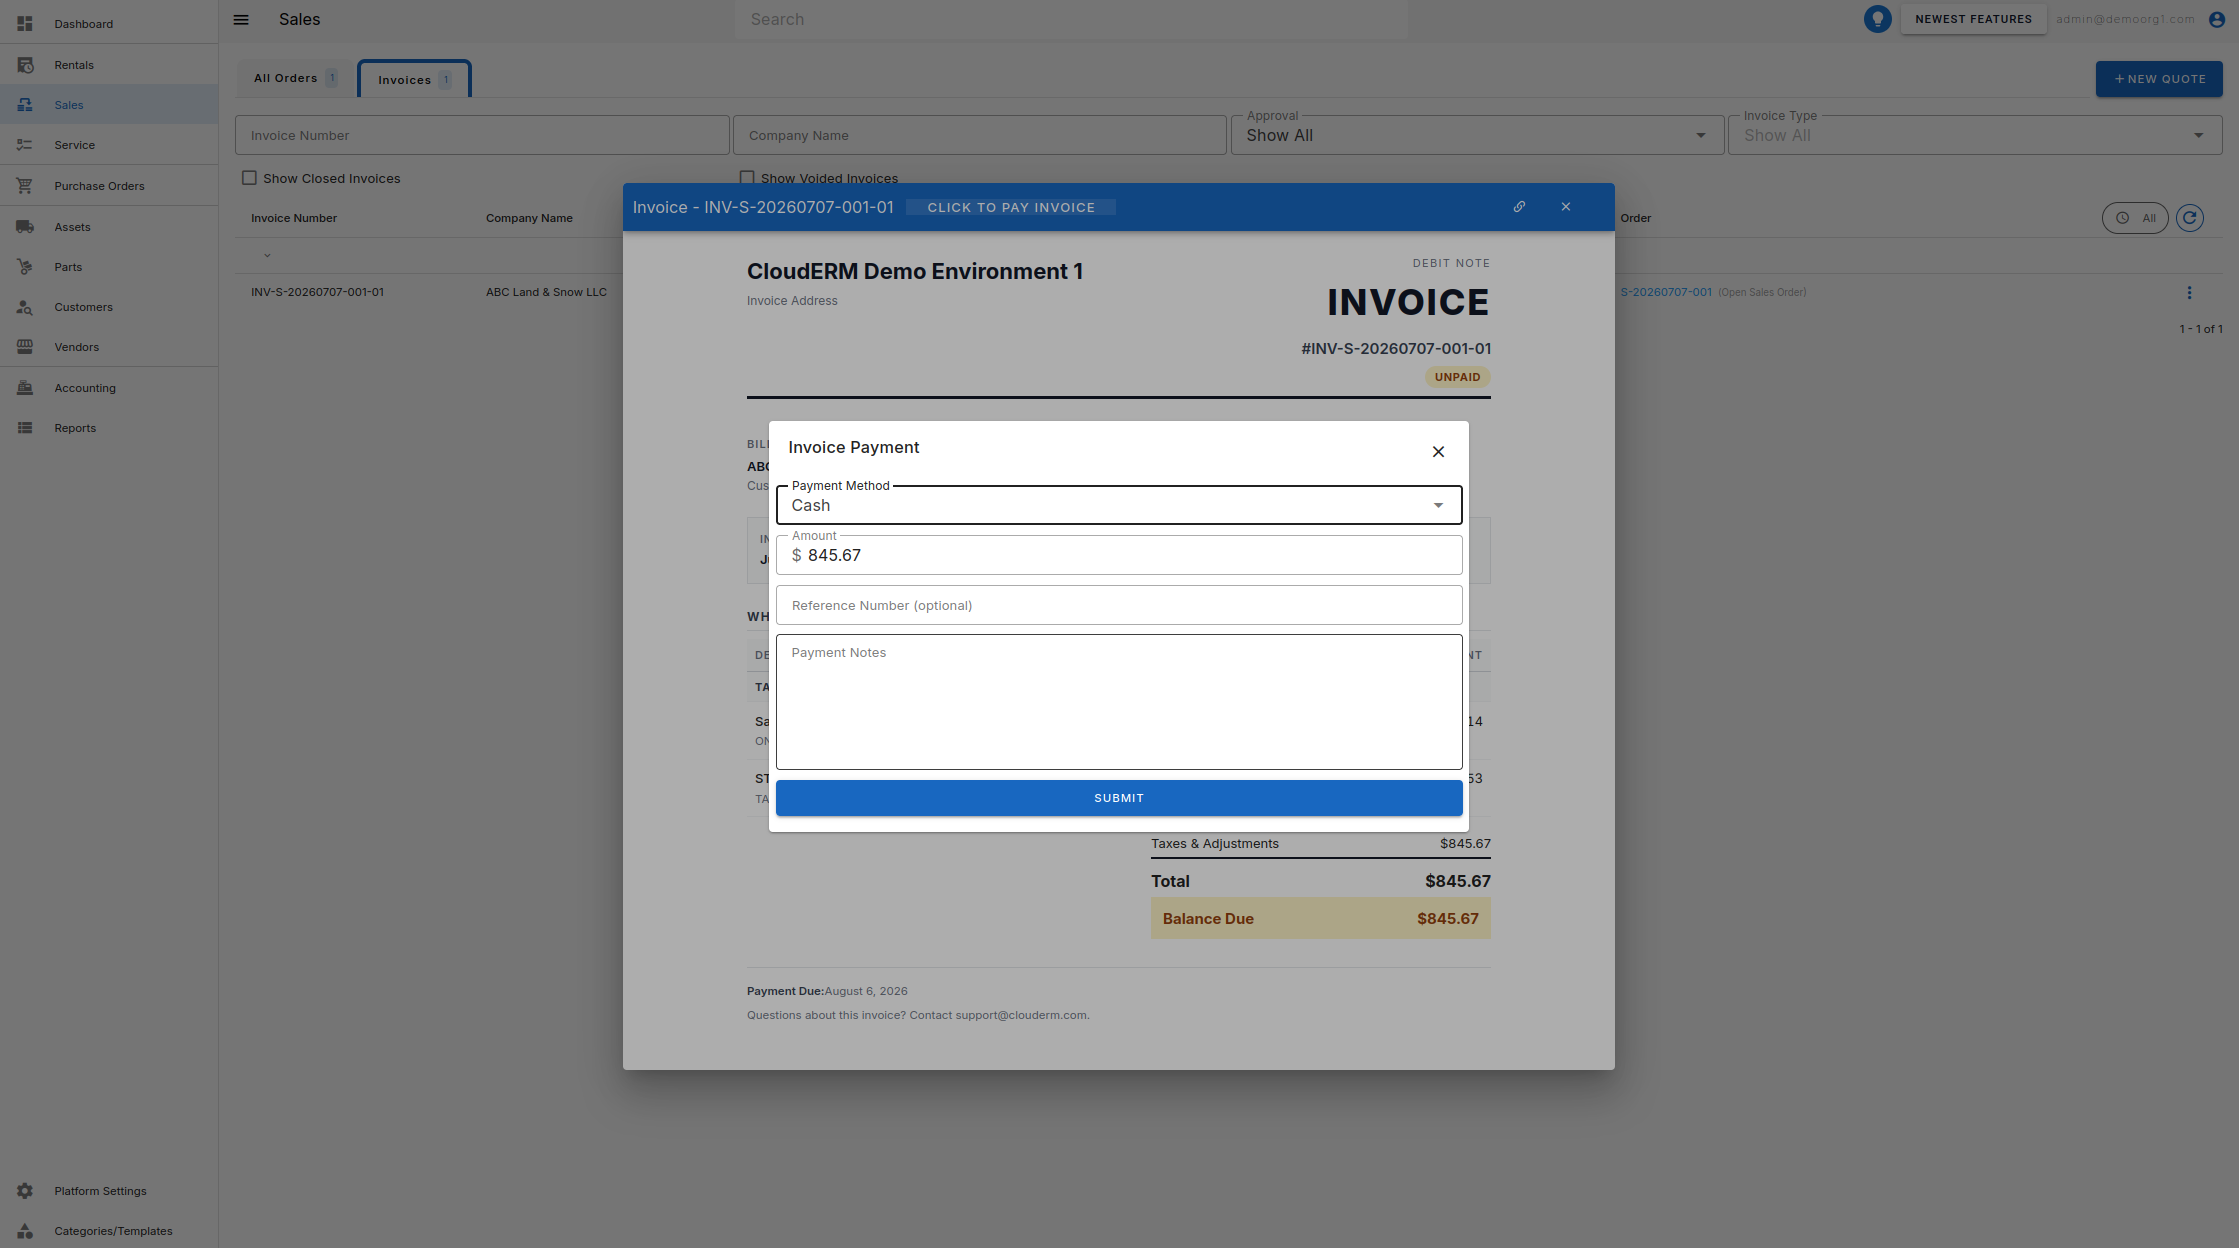
To pay manually, use either the action menu's Invoice Payment or the popup's Click to pay invoice — both open the Invoice Payment Form described below.
Step 2 - Choose a payment method and pay
The Invoice Payment Form asks you to select a Payment Method, then enter an amount. Which methods appear depends on your organization's permissions:
- Cash or Check — for payments received outside the platform. Enter the amount, an optional Reference Number (placeholder
Check #for checks,Reference #for cash), and Payment Notes (required when a cash/check amount is entered). For check (and ACH/wire) payments, an optional bank/clearing date field also appears — labelled Check Clearing Date (optional) for checks and Bank Date (optional) for ACH and wire — recording when the funds clear; it is surfaced on the EOD Payment Register. If your organization has more than one cash drawer, a Cash Drawer selector also appears — choose the drawer the money goes into. - Credit Card — charges one of the customer's saved cards. Select a card, or if none are on file click "No credit card on file. Click to add one" to add one. Card payments require Stripe to be configured; if it isn't, the form shows "Cannot process card payments because stripe is not configured".
The amount field is labelled Card Amount or Cash Amount (or simply Amount when the customer has no balance), and its placeholder shows the invoice's outstanding balance. It defaults to the full outstanding balance, but you can change it. Click Submit to record the payment.
You can record a partial payment by entering an amount smaller than the outstanding balance — the invoice is then marked Partially Paid, and the remaining balance can be paid later in the same way. Paying more than the outstanding balance is also allowed; the excess is credited to the customer's balance.
Pay Using Customer Balance
If the customer has an available balance, the payment form lets you draw on it alongside the payment method:
- Choose a Payment Method and enter the Card Amount or Cash Amount.
- A Use from customer balance field appears (placeholder "Available balance: $X.XX"). Enter how much balance to apply; the cash/card amount auto-adjusts to cover the remainder.
- A summary shows the split, for example "Total Applied = $50.00 (Balance) + $25.00 (Card) = $75.00", with "Balance Applied: $50.00 / $120.00" beneath it.
The balance applied cannot exceed the customer's available balance. The combined total may be less than the outstanding balance (a partial payment) or more than it (the excess is credited back to the customer's balance).
INFO
Note: Balance can also be applied automatically at payment time via the customer's Auto-apply unlinked balance at invoice payment setting, or manually from the customer's Payments tab.
Once an invoice is paid, it is marked as paid and any autonomous events waiting on invoice payment are triggered automatically.
When a credit note (a negative-amount invoice) is paid, it is automatically absorbed into the customer's balance and shown with an "Absorbed into balance" badge in the invoices list. These are also listed in the Credit Notes Issued report.