
Appearance
Editing and Validating Assets
INFO
Note: Assets can only be viewed and edited by organizational users who have been granted relevant permissions
A newly created asset might appear on the "Assets - Pending Assets" Page depending upon organization settings. In this case, once an asset has passed all checklist validations, it is moved to the "Assets - Stock" Page. Assets can be modified during both these stages. Follow the steps below to edit and validate an asset.
Step 1 - Open The Edit Asset Popup
Head to the Assets Page via links available on the Left Navigation Bar. On the Assets Page, search for your desired asset in the Assets Table or filter assets to find your desired asset. Once visible on the Assets Table, click on your desired asset's row to open the Edit Asset Popup.
Alternately, the Edit Asset Popup can also be opened via the Pending Assets Page. To do so, head to the Pending Assets Page. On the Pending Assets Page, search for your desired asset in the Assets Table or filter assets to find your desired asset. Once visible on the Assets Table, right-click on your desired asset's row to open the action menu and click on the Edit option to open the Edit Asset Popup.
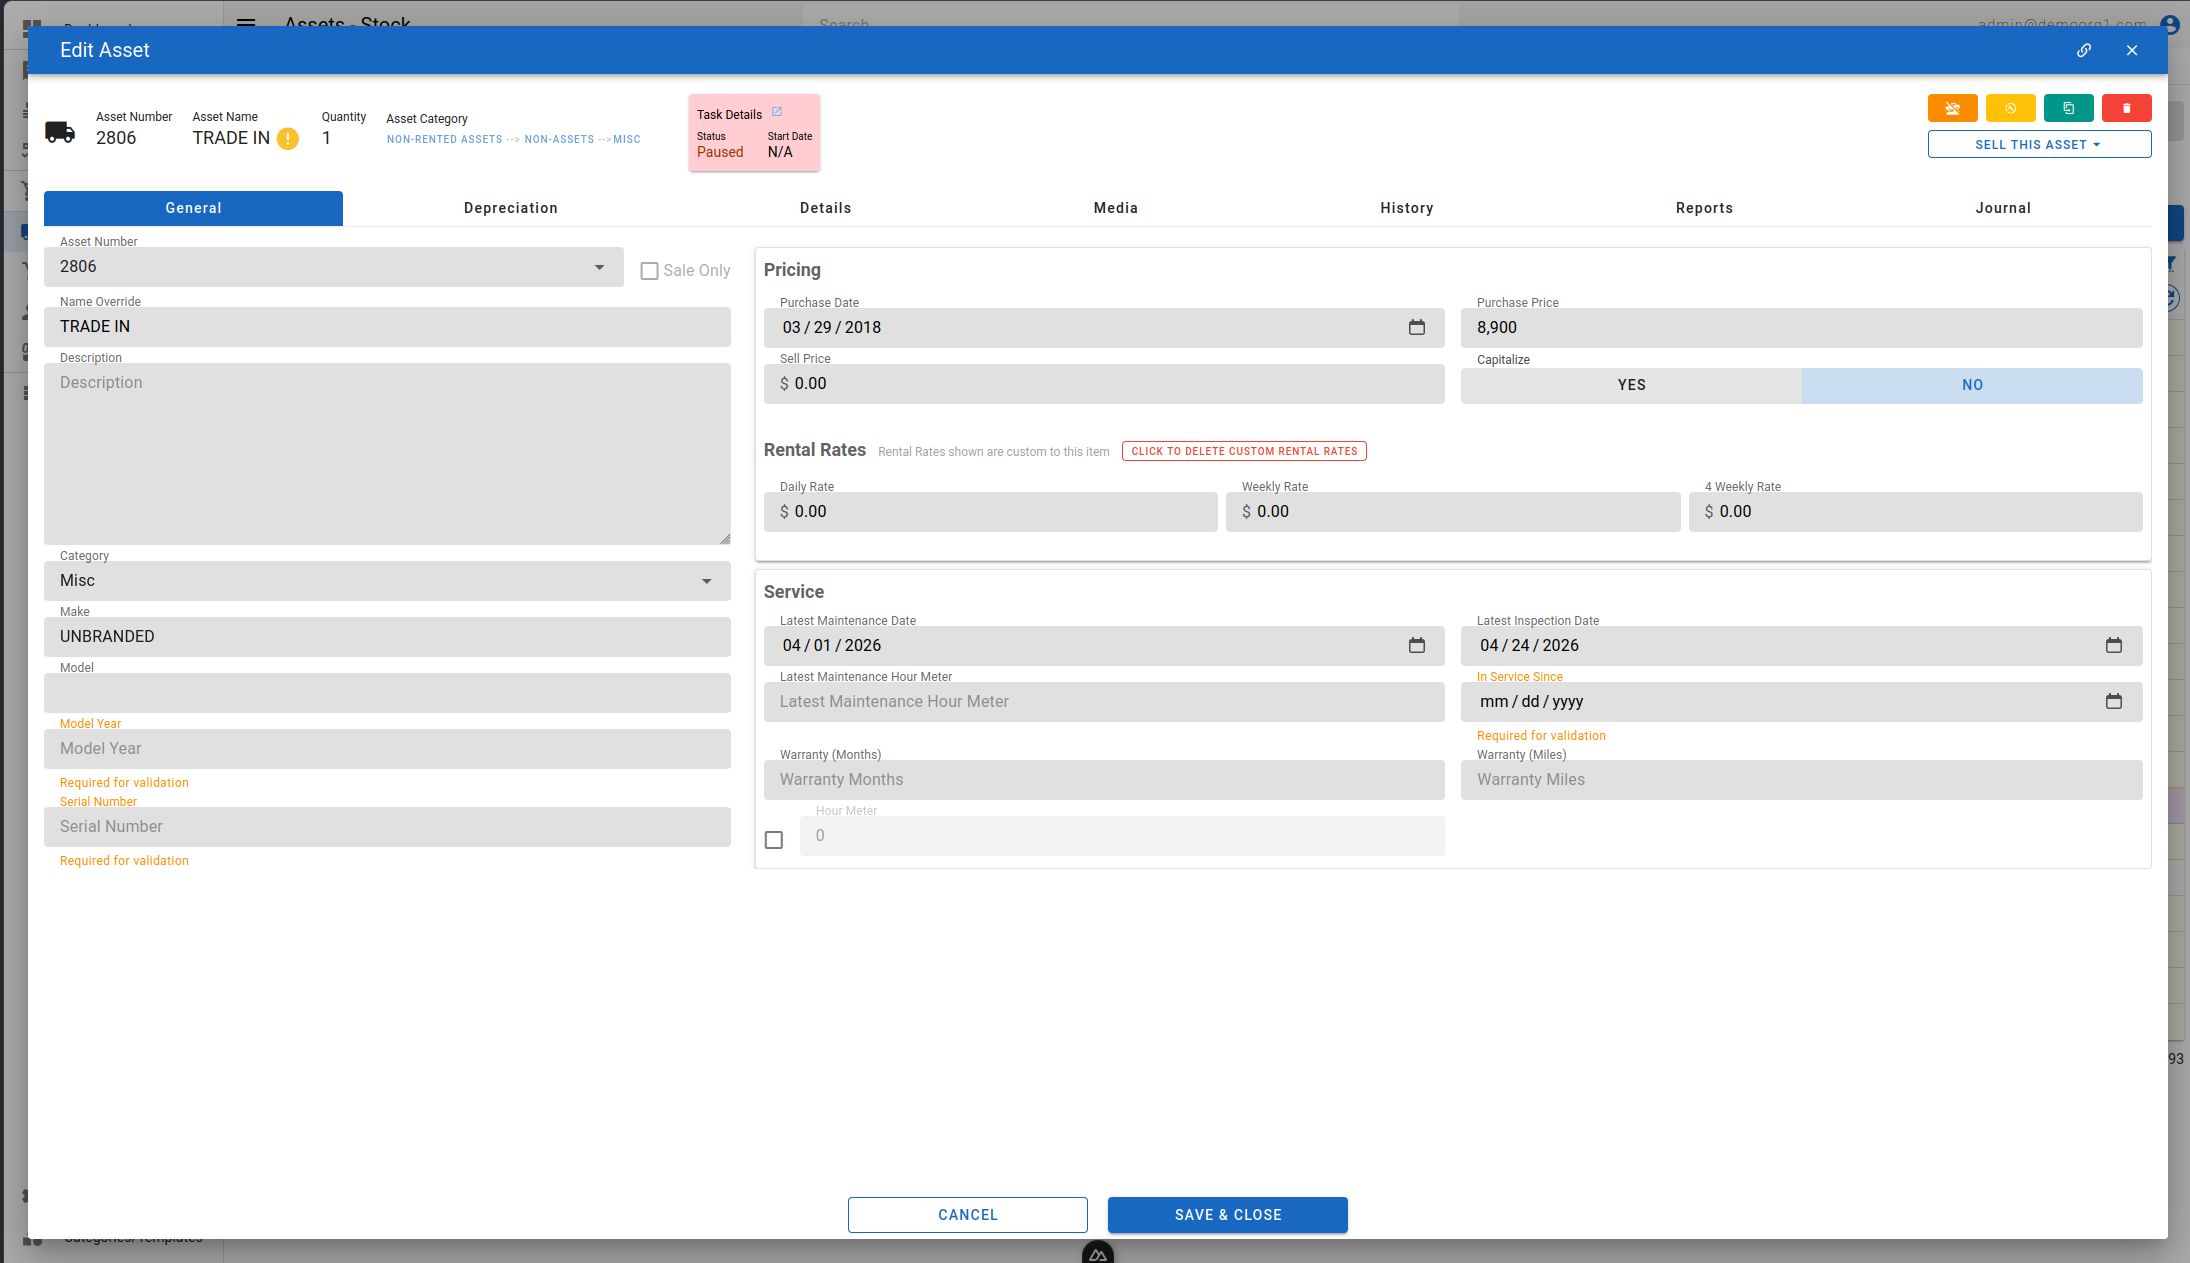
The Edit Asset Popup features an info bar at the top, that displays the asset number and asset name, as well as available quantity and the number of the latest purchase order on which this asset was ordered. It also shows a Rental Order Status field — the title-cased status of the asset's current rental order (for example, "Ready For Inspection"), or None when there is no active rental order; clicking it opens the asset's History tab. When the asset has an open New Asset Detail Checklist, a Detail Checklist link also appears in the info bar, showing the checklist's status (for example "Ready"); clicking it opens the checklist in a new tab. A yellow badge adjacent to the asset name indicates that the asset is currently marked invalid due to missing required or required for validation information. To learn more about required and required for validation fields, you can refer to out field settings guide
Hovering over the yellow badge will display a list of all validation errors. Clicking on any of these errors will navigate user to the relevant tab within the Edit Asset Popup.
The pink card at the top displays the work order details associated with the specific asset. It provides a quick overview of the work order context in which the asset is being used. Upon clicking the navigation link within the card, the user will be redirected to the relevant work order where the asset is consumed, provided there is only one associated work order. If multiple work orders are linked to the asset, the user will instead be redirected to the History → Work Orders section within the same popup to view all related work order records.
The bottom-left corner of the popup's footer displays the asset's GUID (its unique database identifier), truncated to the first and last four characters (for example GUID: a1b2...9z8y). Hover over it and click the copy icon to copy the full GUID to your clipboard.
Step 2 - Edit And Save Desired Information
The Edit Asset Popup features tabs that group the asset's information: General, Purchase Details, Depreciation, Details, Media, History, Reports, Journal, PO History, and Telematics (only shown when your organization has the Samsara GPS module enabled — see Telematics). Fields that appear in red are required fields, where as fields that appear in yellow are fields required for validation.
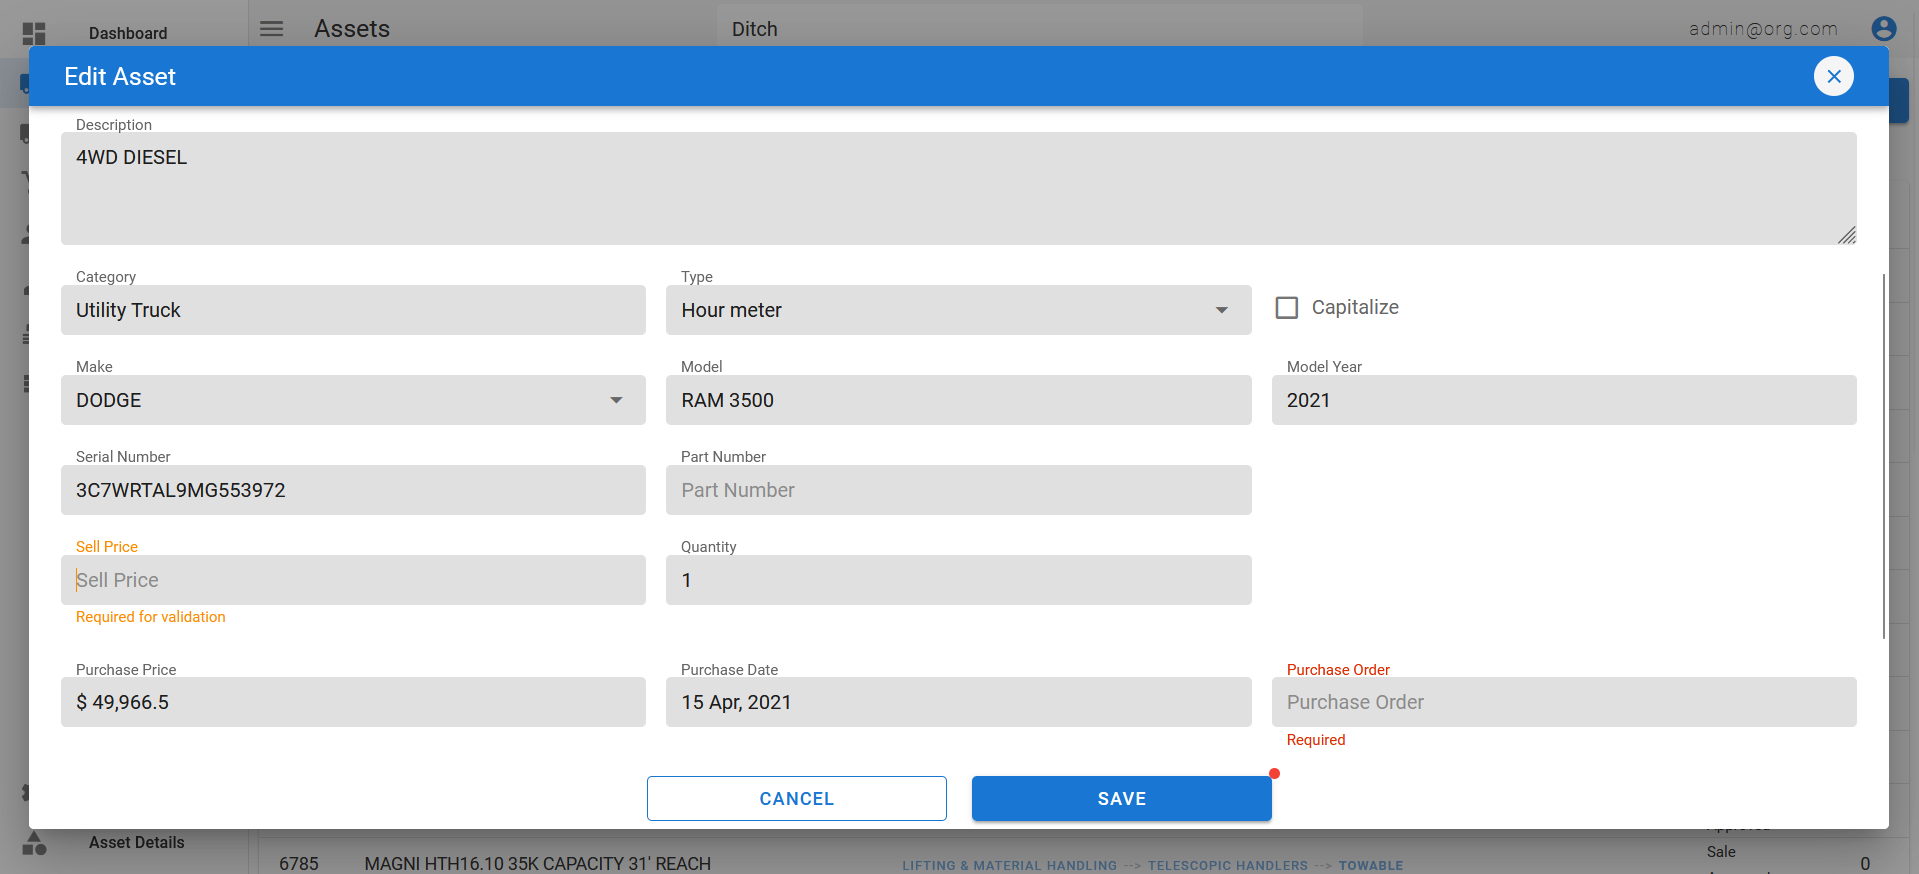
The General tab includes a PO Number field. It can be set manually for assets that are not tied to a purchase order, but is automatically disabled (greyed out) once the asset is linked to a purchase order — in that case the linked purchase order is shown as the latest purchase order in the info bar. On the General tab, Purchase Price and Purchase Date are read-only and derived from the Purchase Details tab (see Purchase Details).
To modify information, simply click on a field and enter/modify information. When information is modified, the Save button will display a red badge to indicate stale information that has not yet synced with our database. Clicking the Save button will sync this information on our servers and the red badge will disappear.
Step 3 - Validating An Asset
The Edit Asset Popup auto-saves information, unless there are empty fields that are either required or required for validation.
An attempt to save an asset with missing required information will always fail, and the user will be guided to the first field that has missing required information. All required fields must be filled to enable saving the asset, and to be able to mark the asset as validated.
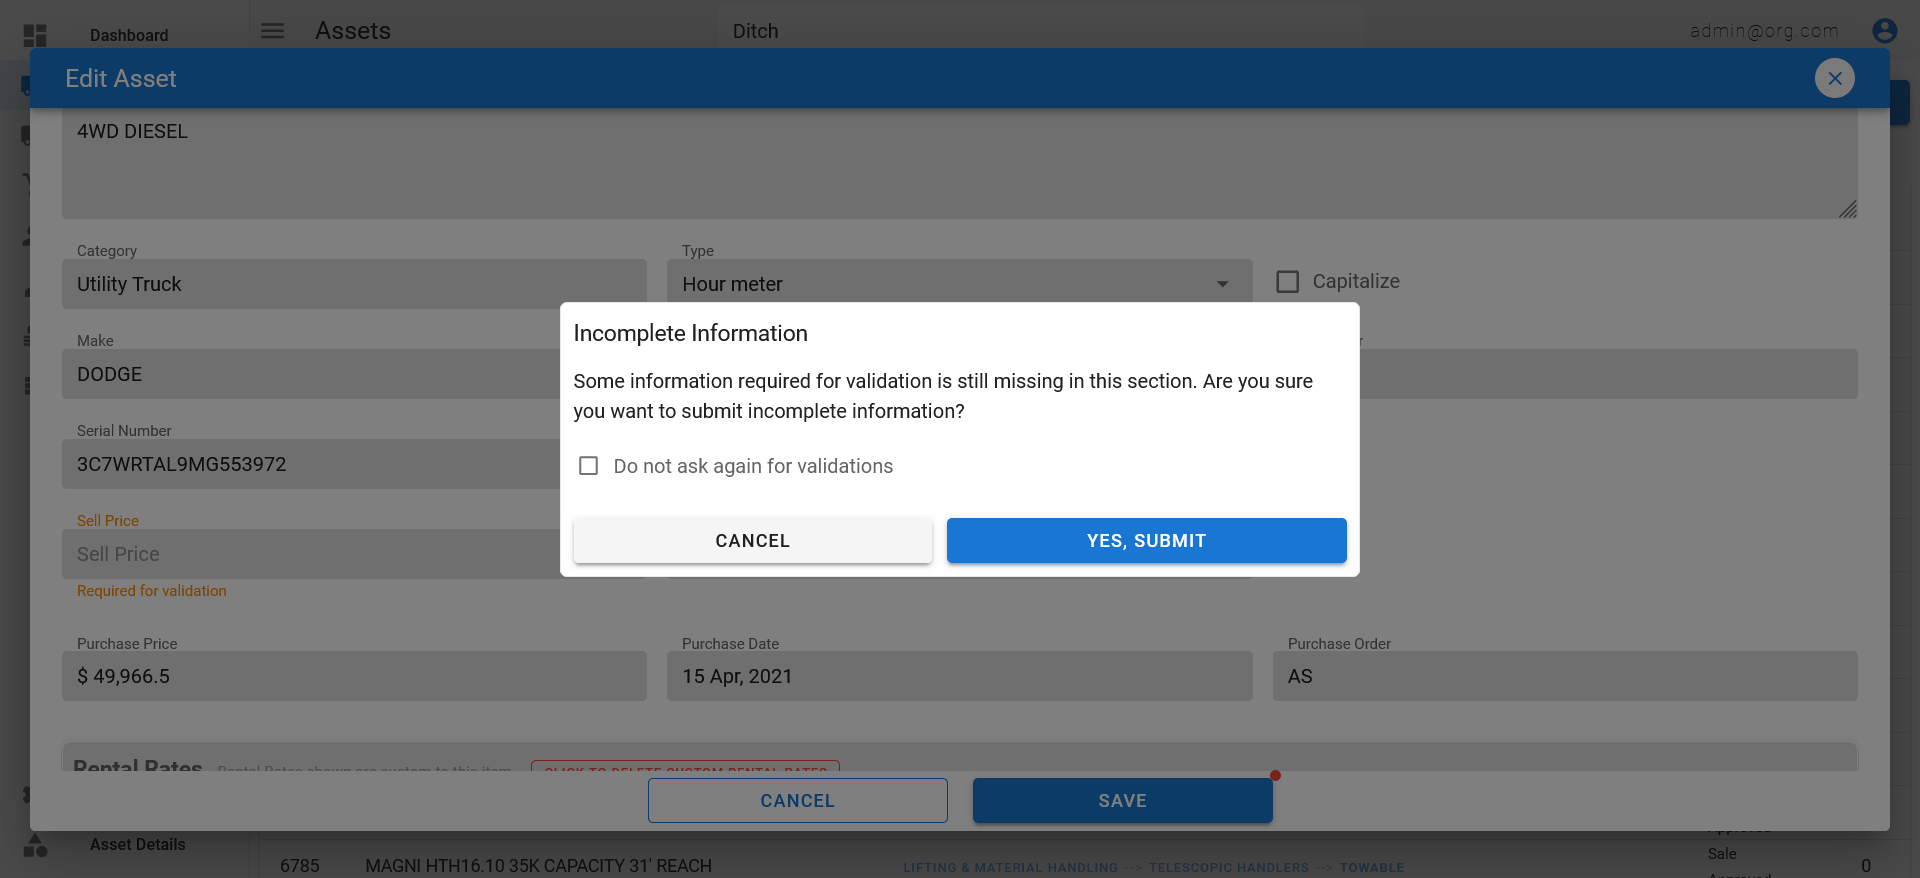
An attempt to save an asset with missing required for validation information will prompt the user with a warning. The user can choose to proceed with saving the modified information or abort. All required for validation fields must be filled to be able to mark the asset as validated.
Once all required and required for validation field on an asset are filled and synced with our servers, the yellow badge indicating validation errors will disappear and the asset will automatically be marked as validated.