Appearance
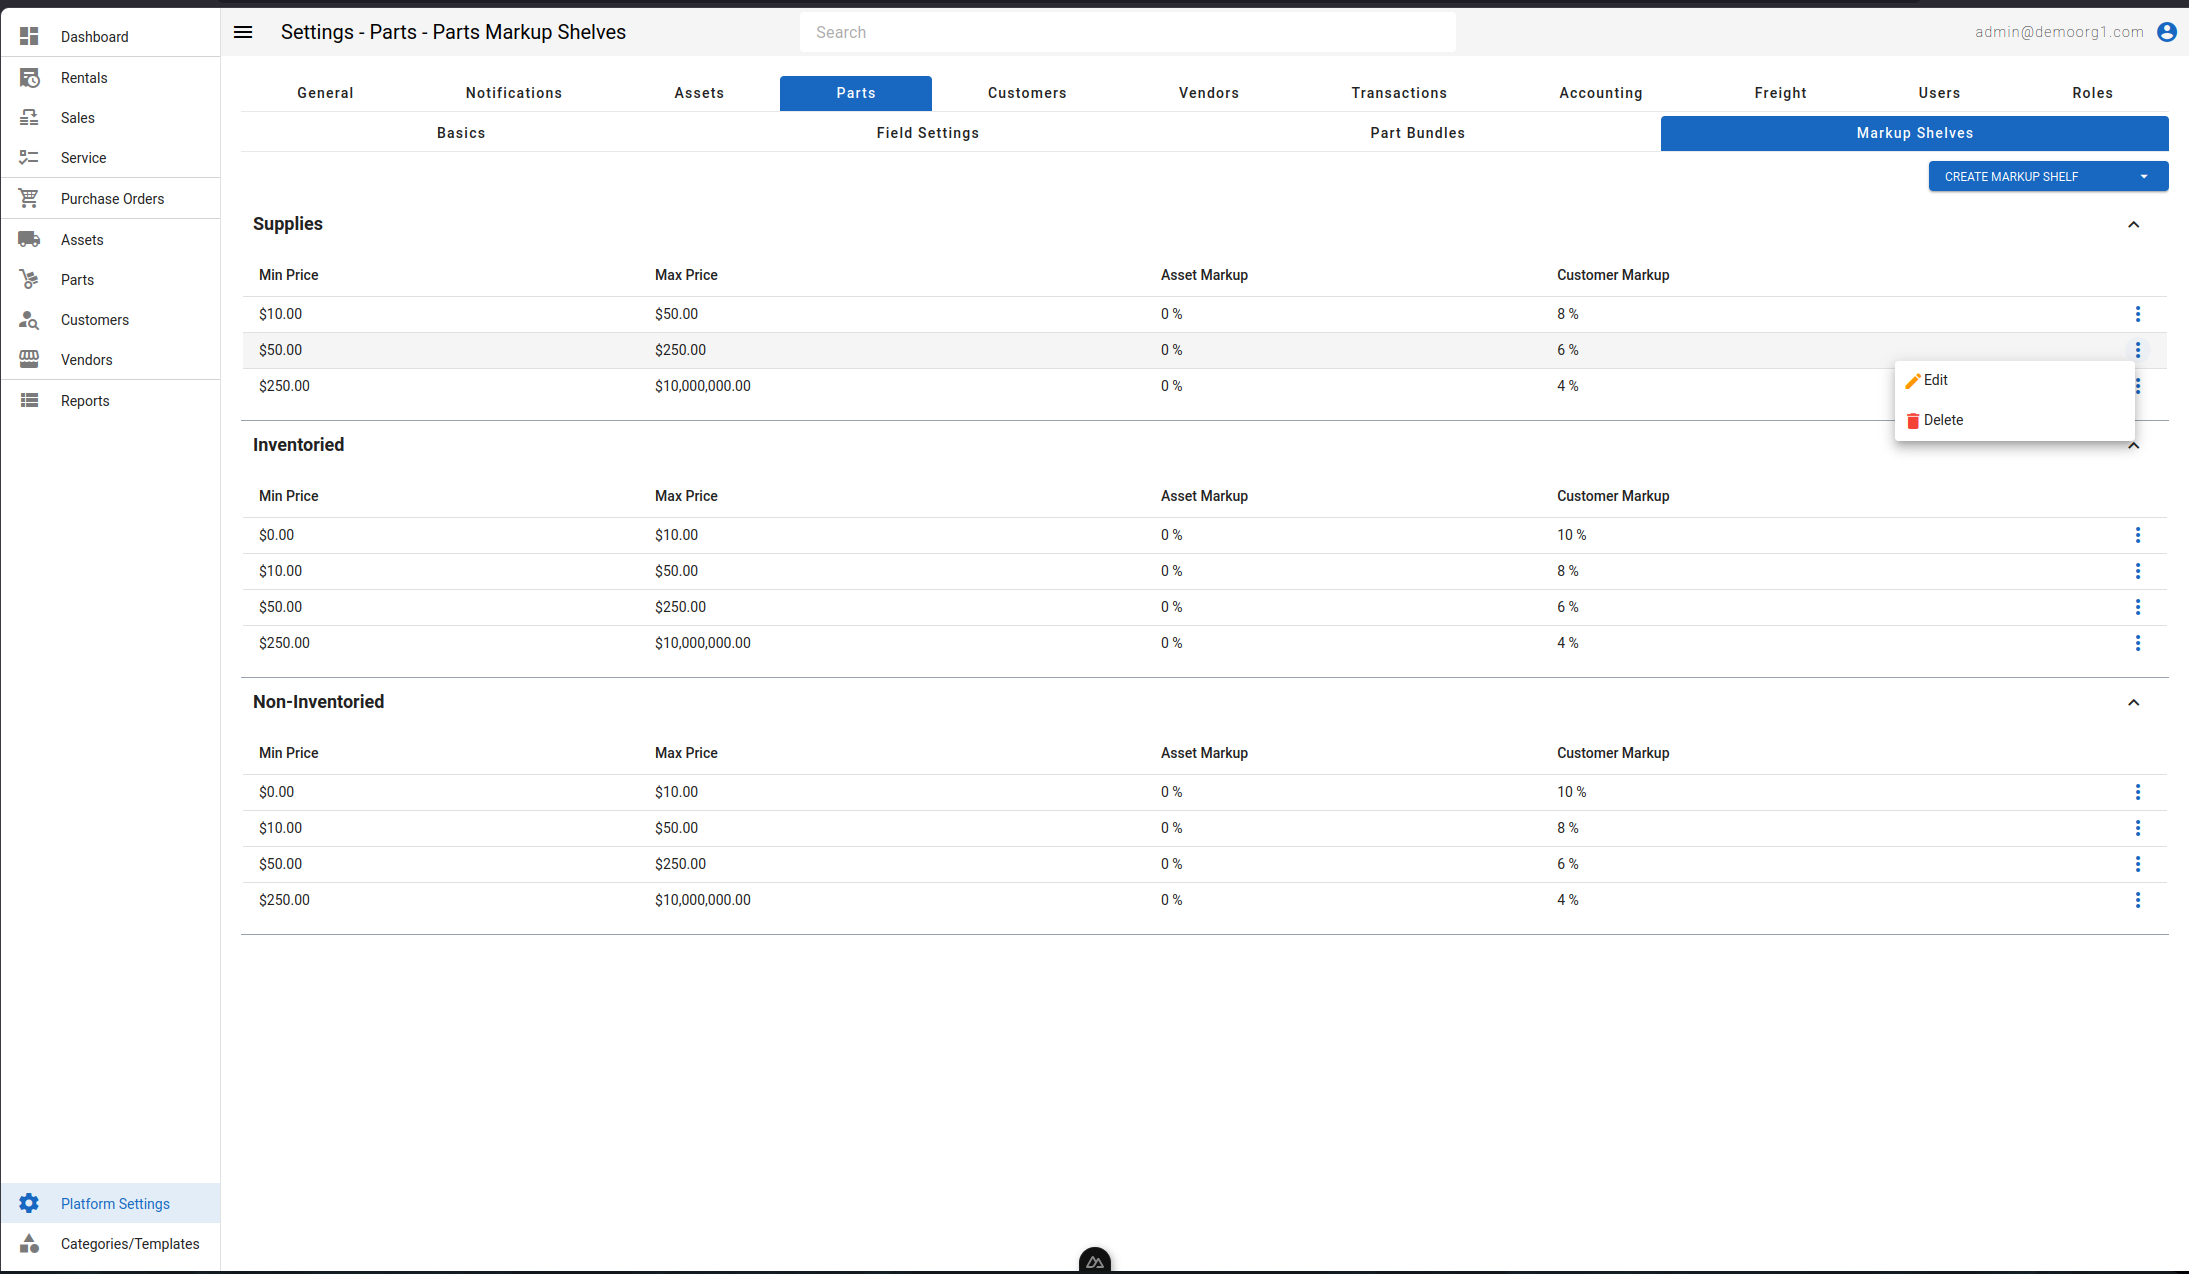
Markup Shelves
INFO
Note: Part Markup Shelves can only be viewed and created by organizational users who have been granted relevant permissions
Markup Shelves are an accounting concept that allow organizations to control default markups on certain defined sets of parts, when charging them to a customer or the organization.
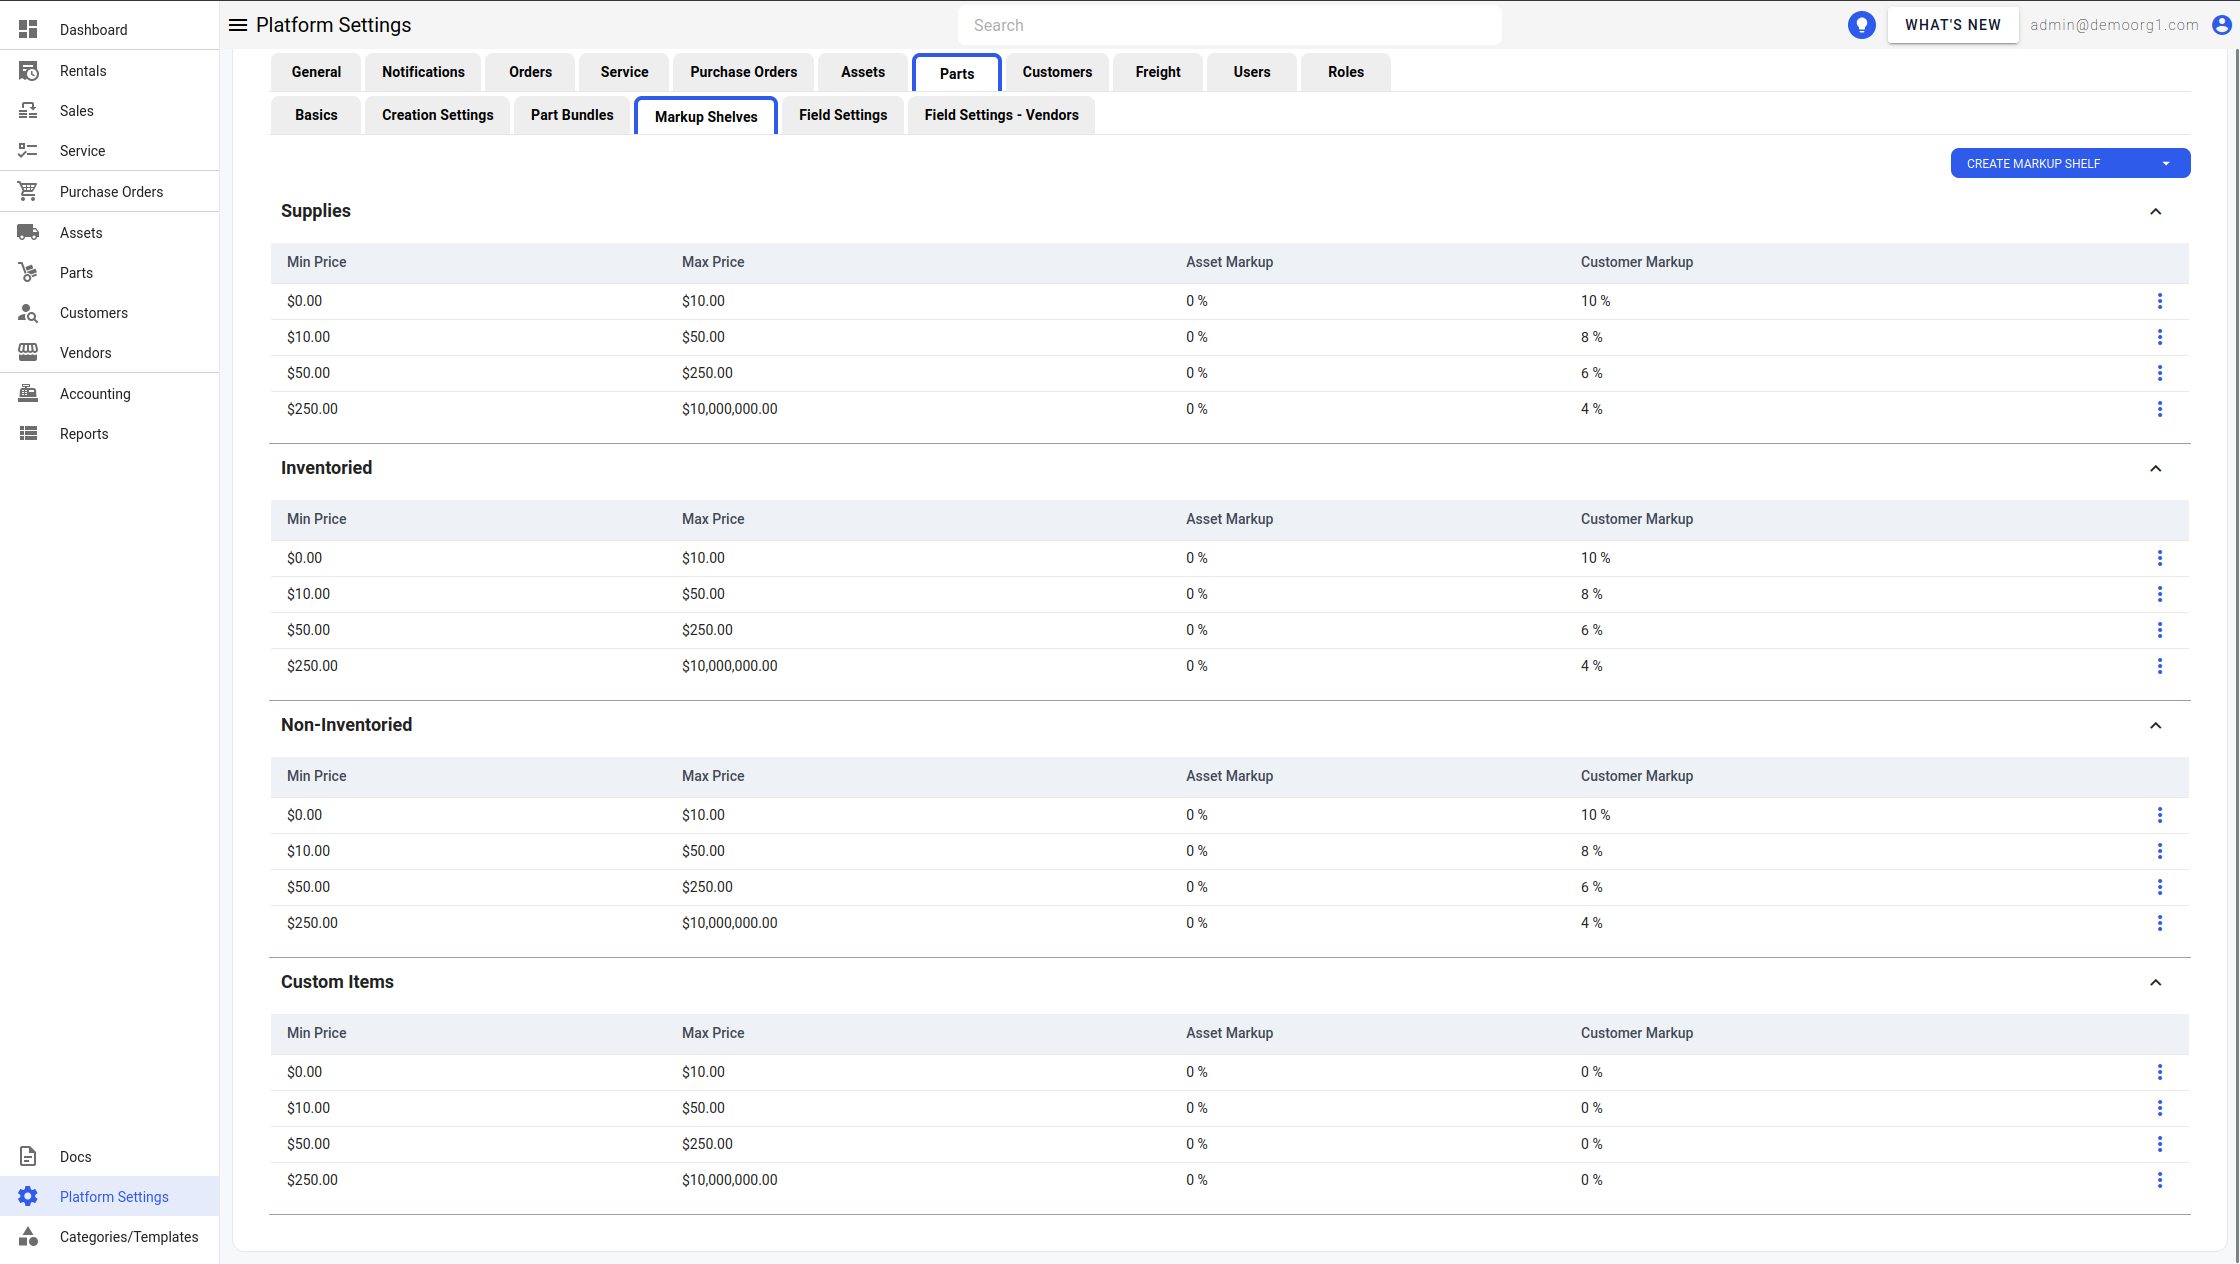
Part Markup Shelves differentiate between parts based on part type and it's price range.
Custom Items Shelf
The Custom Items shelf applies markup to custom items added to work orders (items that are not in the parts catalogue). It uses the same editor and overlap checks as the other shelves.
When adding a custom item to a work order, the price field is labelled Base Price (Before Markup). The matching Custom Items shelf markup is added on top of it, and the line in the work order shows the base price struck through above the marked-up price with a +N% markup note (hover to see the markup amount). Custom items saved before this feature keep their existing price and are not marked up. The same Base Price (Before Markup) label is used for custom lines allocated from a purchase order.
Creating A Markup Shelf
Follow the steps below to create a part markup shelf
Step 1 - Click The Create Markup Shelf
When the Create Markup Shelf button is clicked, a menu appears with the following four shelf types:
- Supplies
- Inventoried
- Non-Inventoried
- Custom Items
Users can select the desired type to create a markup shelf.
Step 2 - Open The Create Markup Shelf Popup
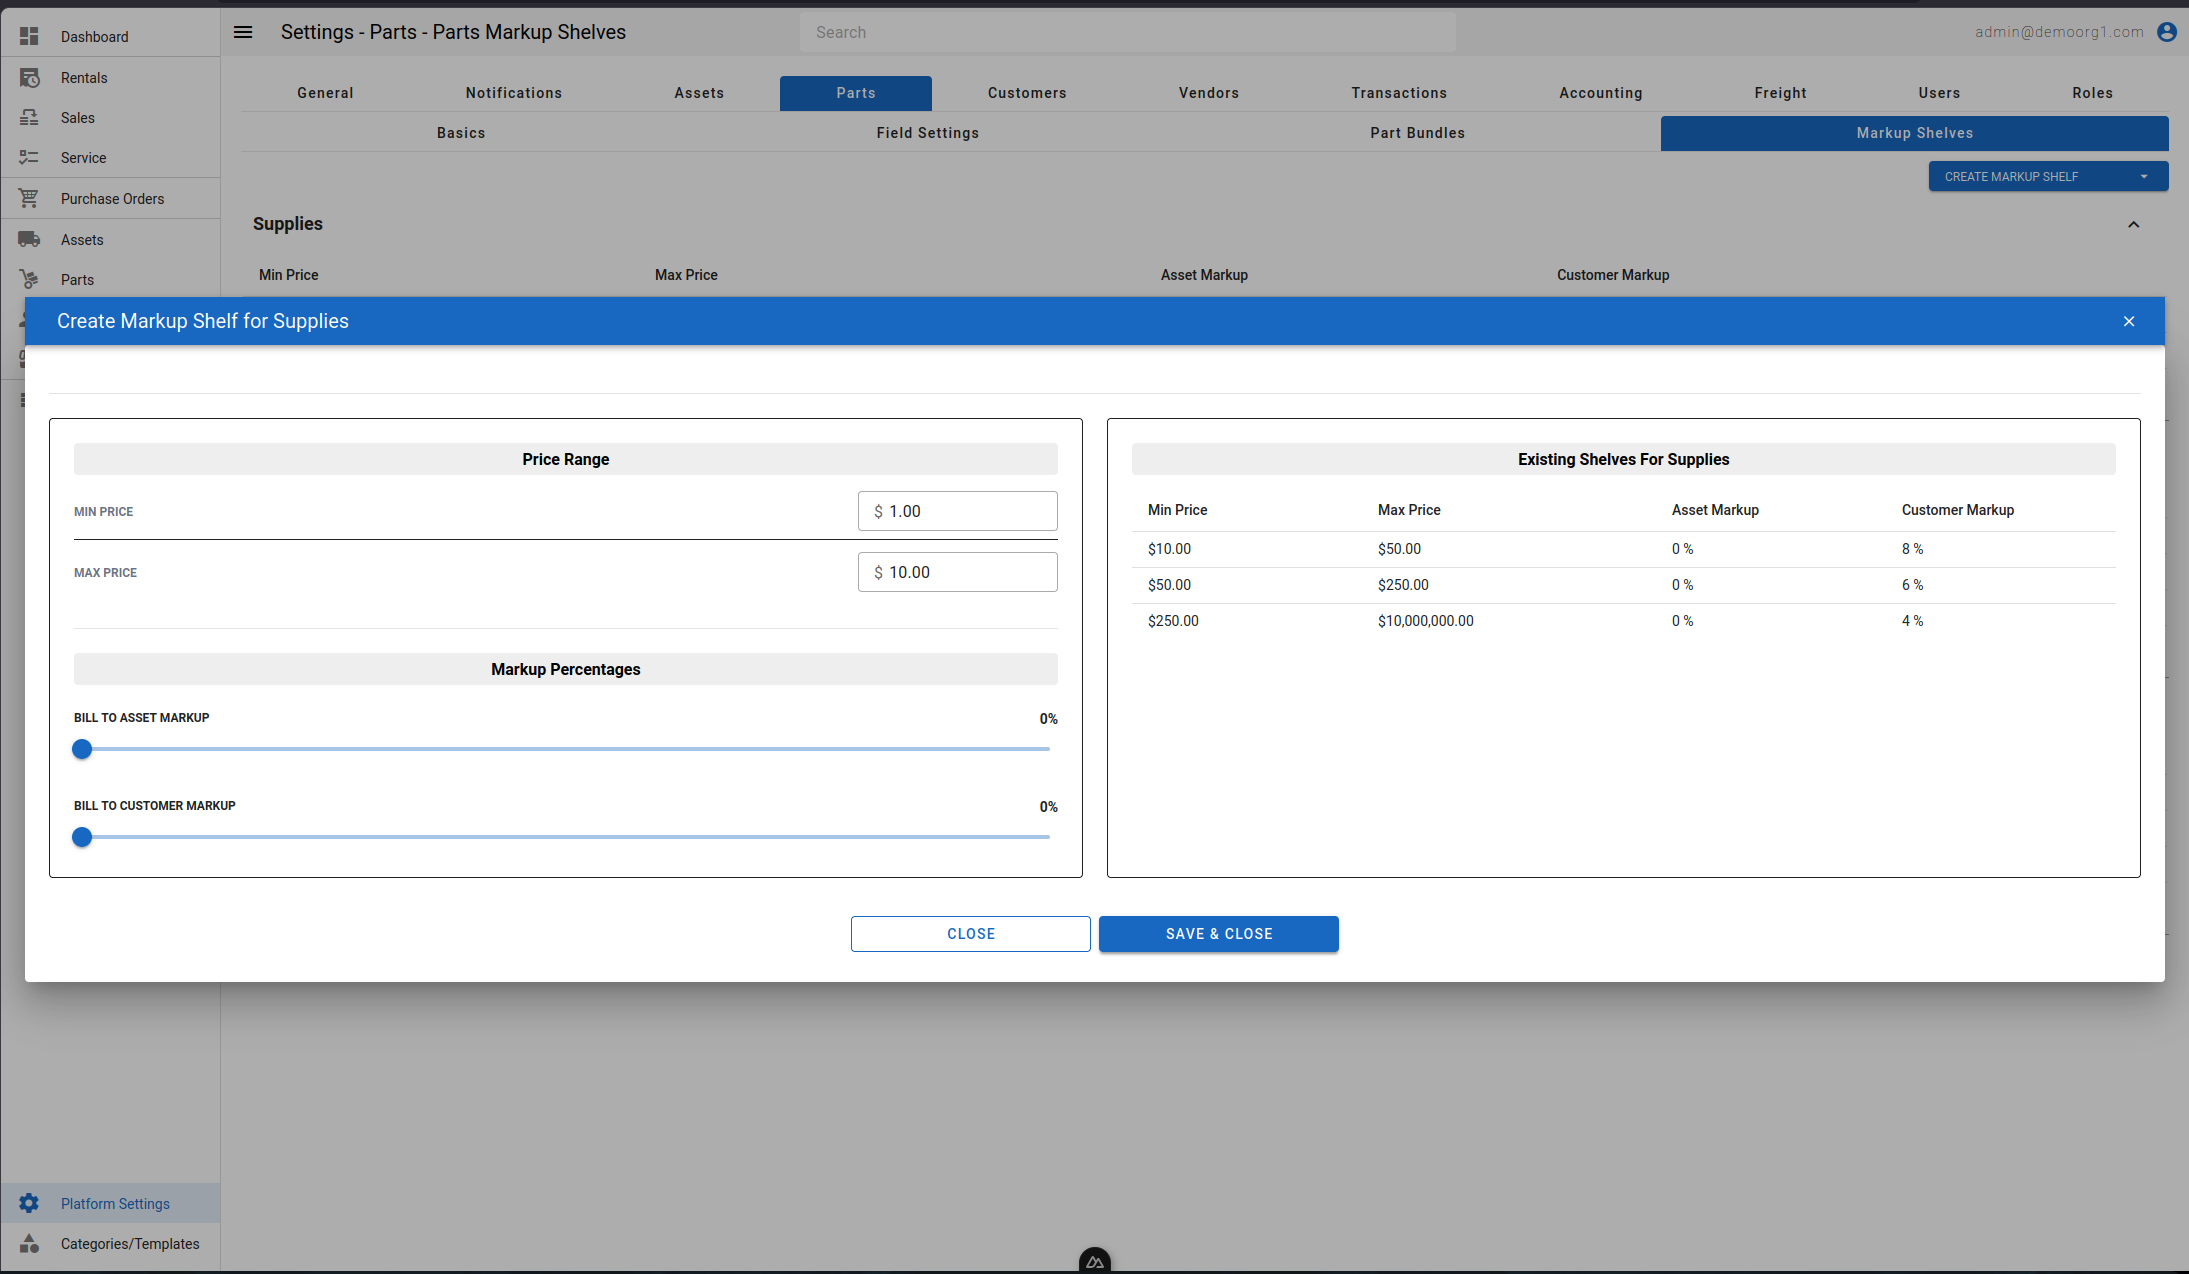
After selecting a shelf type, the Create Markup Shelf popup will open.
This popup displays:
- Existing markup shelves for the selected type
- A form to create a new markup shelf
To create a new shelf, users must enter valid required information and click Save & Close to save the record.
Editing A Markup Shelf
Follow the steps below to edit a part markup shelf
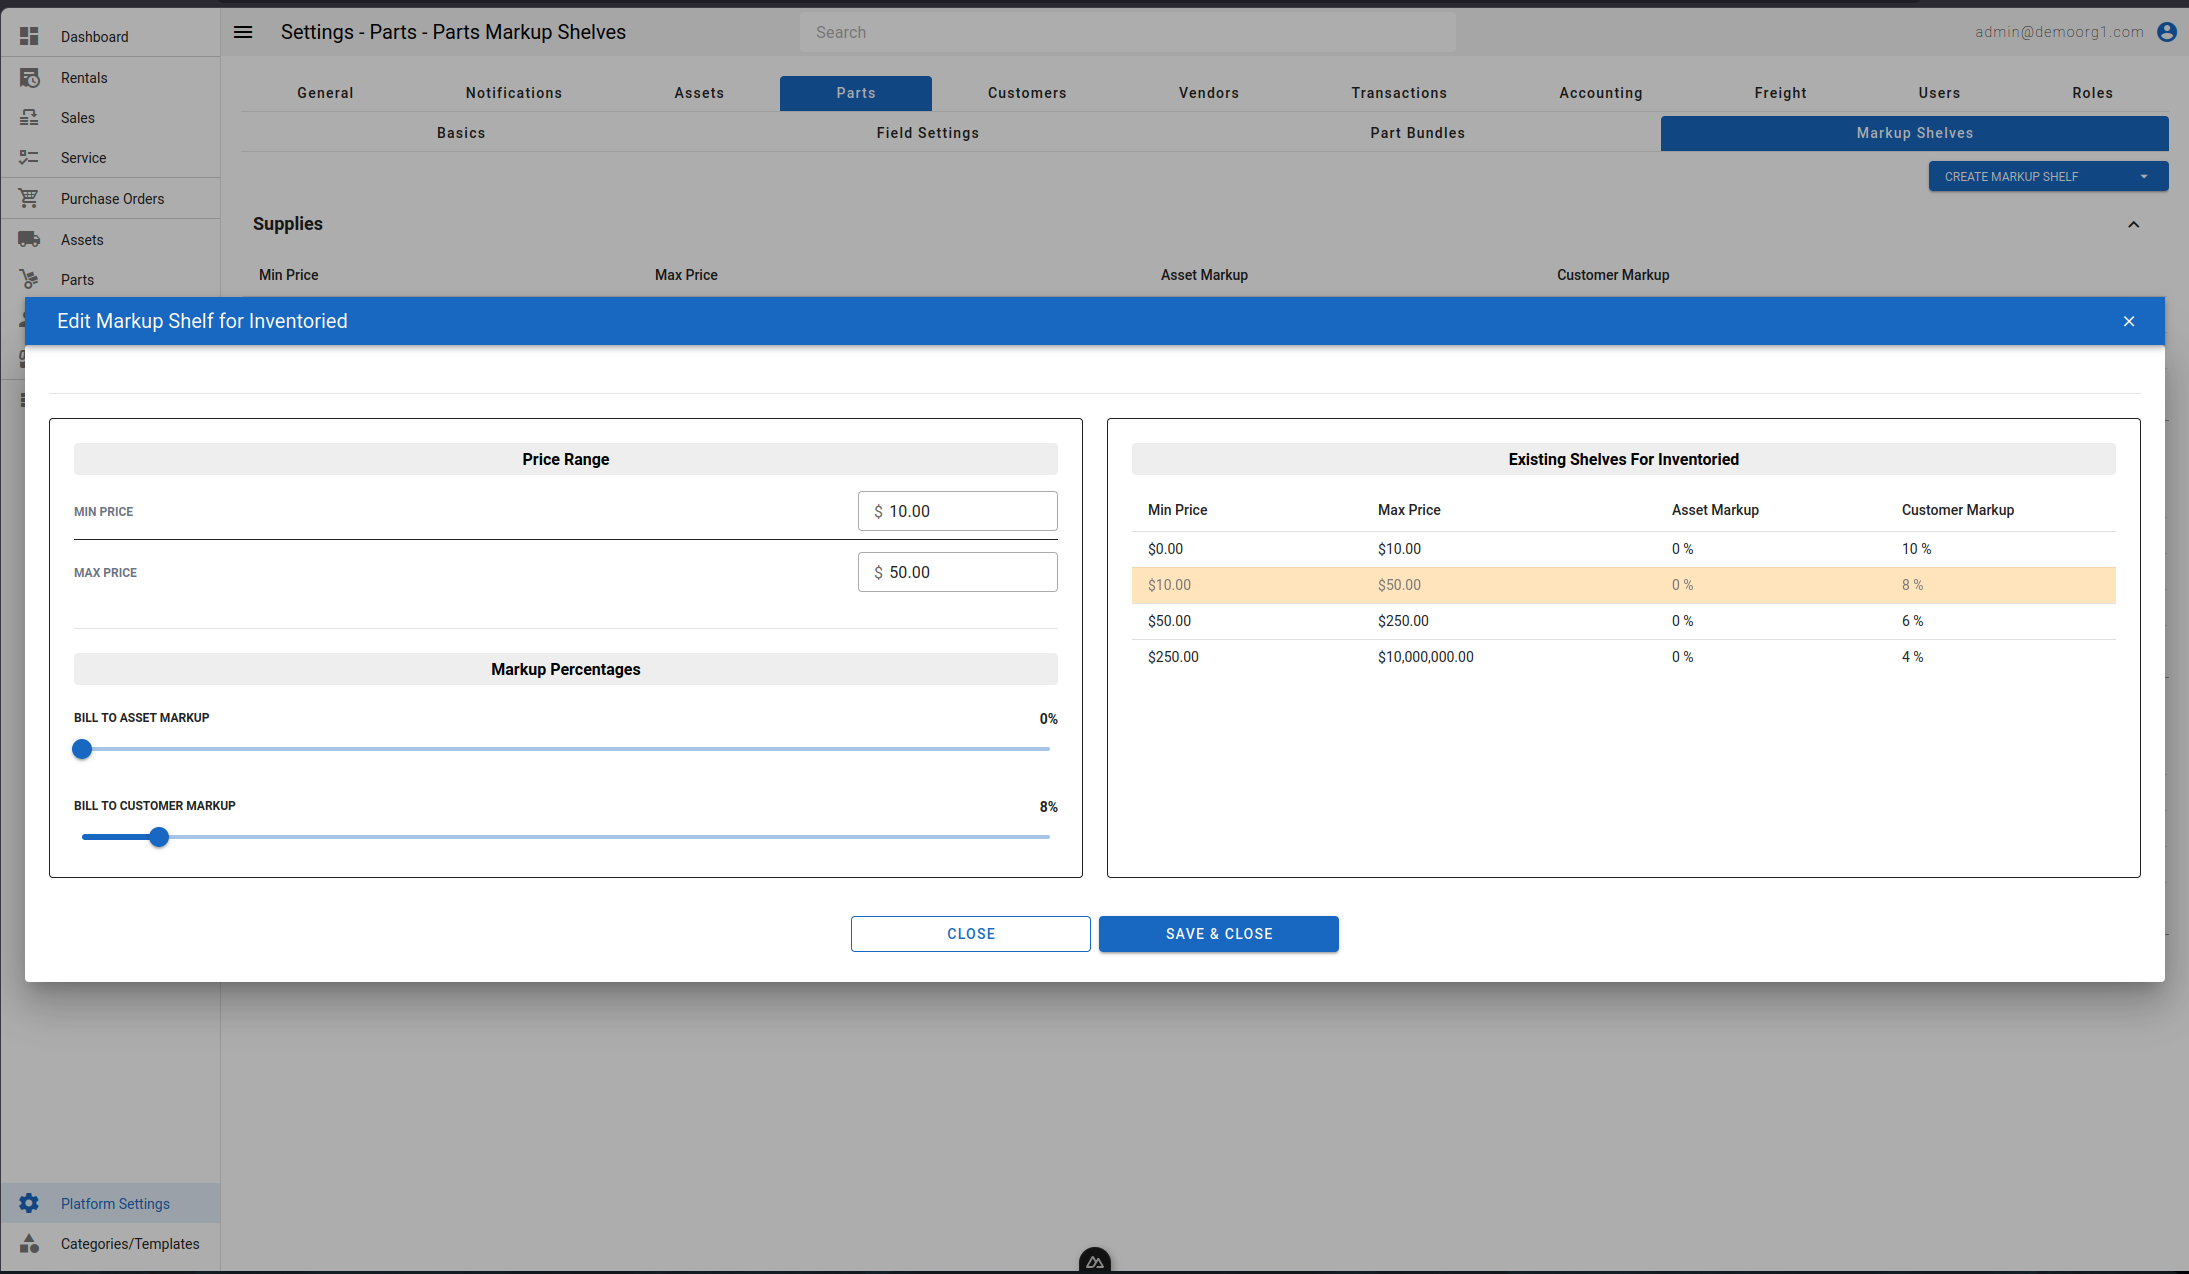
Step 1 - Open The Edit Markup Shelf Popup
Head to the Platform Settings Page via links available on the Left Navigation Bar and head to the Parts Tab -> Markup Shelves Tab. On the Markup Shelves Tab, search for your desired markup shelf's row in the tables and click either on that row or vertical dots menu at the left most which triggers options e.g edit and delete, click on edit to open the Edit Markup Shelf Popup.
Step 2 - Edit And Save Desired Information
To modify information, simply click on a field and enter/modify information. Once modified, clicking the Save & Close button will sync this information on our servers.
Deleting A Markup Shelf
Users can open the actions menu for a markup shelf by either:
- Right-clicking on the desired markup shelf row in the Markup Shelves table, or
- Clicking the vertical three-dot icon on the far right of the row
The actions menu includes a Delete option.
Step 1 - Open Delete Confirmation Prompt
When the Delete button is selected, a confirmation prompt will appear to verify the action before permanently deleting the selected markup shelf.
Warning: Deleting a markup shelf may remove associated configurations or references. Confirm carefully before proceeding.