Appearance
Emailing Documents
Rental orders, sales orders, invoices, work orders and inspections are all emailed from the same Email Composer popup. You choose who gets the email, write the subject and message, and pick which files to attach. The document you are emailing is always attached as a PDF.
Opening the Email Composer
Right click on a row (or click its three dots icon) to open the action menu, then click Email. The Email Composer opens straight away; there is no longer an Email submenu with Send to, Self and Custom Email options.
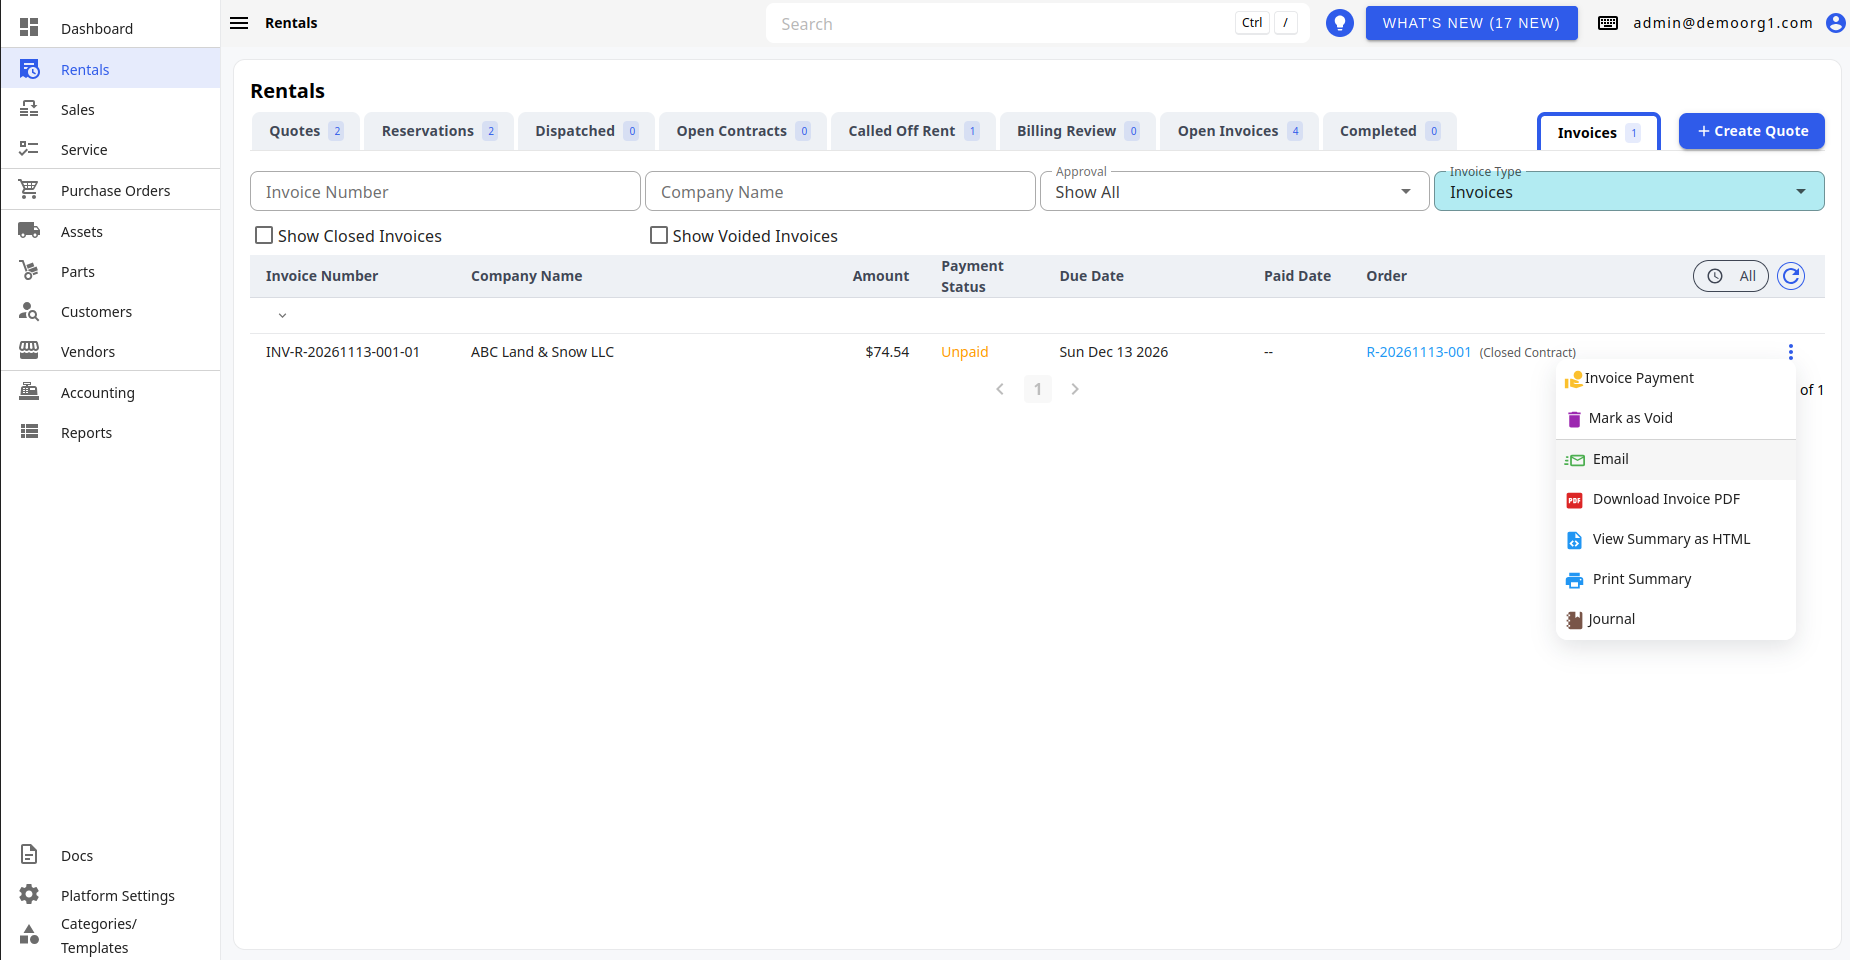
The Email item is available on:
- Rental orders (quotes, reservations and contracts)
- Sales orders
- Invoices (rental, sales and work order invoices)
- A customer's Transactions tab
- Service work orders and inspections, including the gantt view
- Inspection reports
INFO
Note: Rental contracts no longer have a separate Email Inspections option. To send inspections, open Email on the contract and tick them under Attachments → On This Order.
You need permission to view the type of document you are emailing (rental orders, sales orders, work orders, or that type of invoice).
Customer portal users see Email only on invoices, and can only send the email to themselves.
The Email Composer
The popup's title reads Email · <document> <number>, and the customer's name is shown at the top.
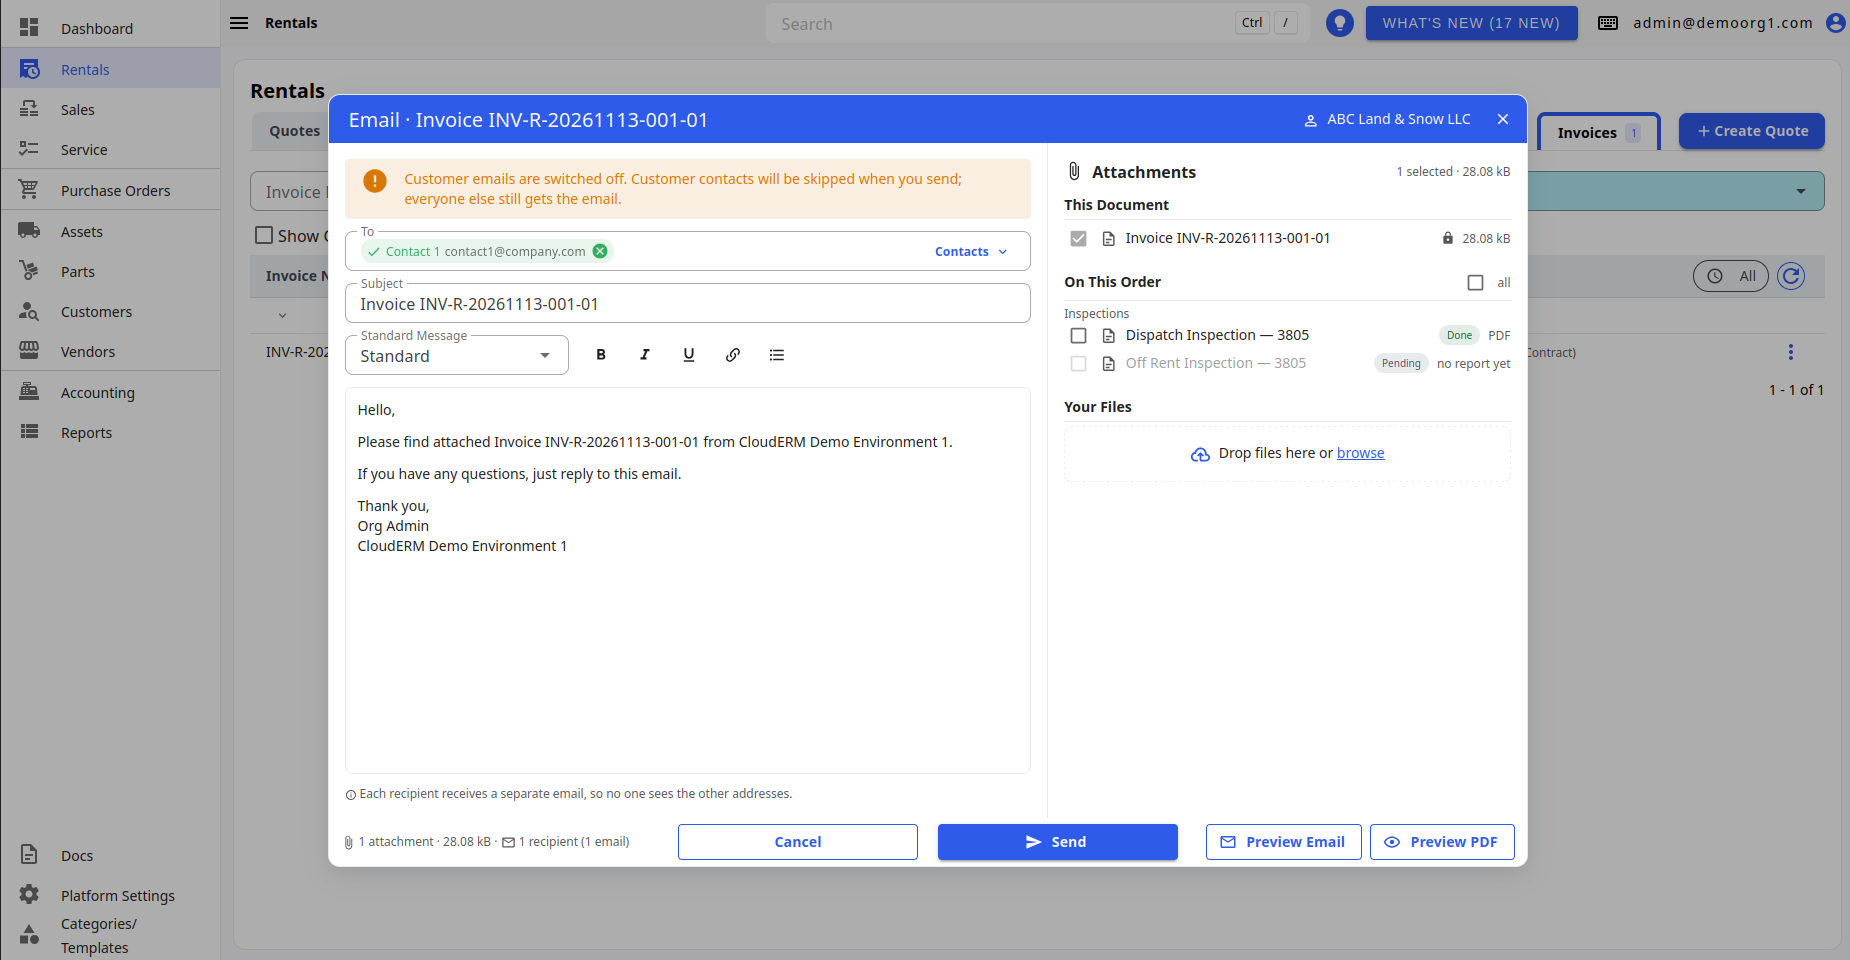
Warnings
Depending on the document and your environment, one or more warnings may appear at the top of the popup:
- Email sending is switched off in this environment, so nothing sent from here will be delivered.
- A warning when customer emails are switched off (customer contacts will be skipped when you send, everyone else still gets the email), or when addresses can't be typed in and recipients must be picked from Contacts.
- This invoice is a draft. It hasn't been approved yet. — shown on an unapproved invoice. This is only a warning; you can still send the email.
Recipients (To)
The To field holds the recipients as chips. The order's default contact is filled in for you.
- To add a recipient, click Contacts and pick from the list, or type an address in the To field (Add a contact or type an address...) and press
Enter. - An address that isn't valid is marked in red, and the email can't be sent until you Remove or fix the address marked in red.
- Remove a recipient by clicking the cross on its chip.
The Contacts picker has a search field (Search contacts or type an address...) and lists recipients in groups:
| Group | What it lists |
|---|---|
| Customer Contacts | The customer's contacts with their name, title and email (or no email on file). The order's default contact is tagged Default on order. Contracts and Invoices tags show what the contact is flagged for, but are for information only: any contact with an email can be picked. |
| Self | You. Self receives the same version of the email the customer does. |
| Employees | Your organization's employees. The mechanic on a work order is tagged Work order mechanic. |
| Recent | Addresses typed in on earlier emails to this customer, with the date and subject of that email. |
Click Manage Customer Contacts at the bottom of the picker to open the customer's Contacts tab.
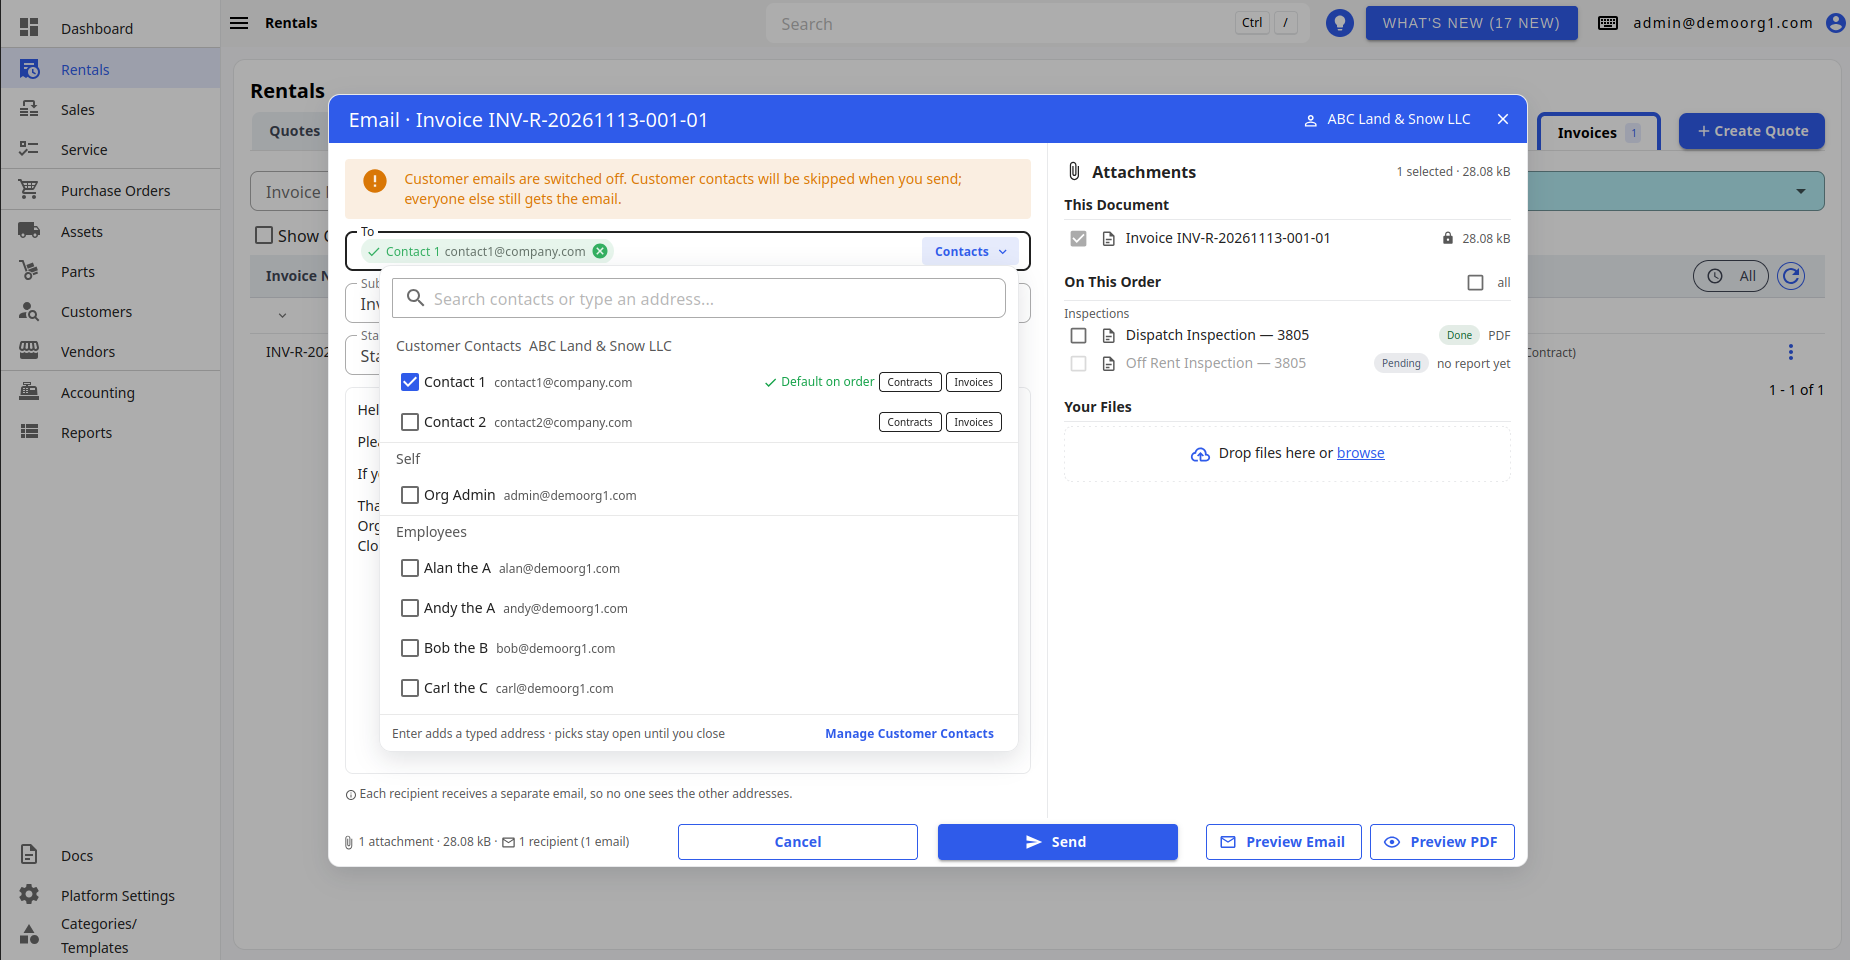
Each recipient receives a separate email, so no one sees the other addresses. There are no CC or BCC fields.
Subject and Message
- Subject: Required, up to 200 characters.
- Standard Message: Pick one of your organization's message templates. Picking a template replaces both the subject and the message body.
- Message body: Write the message. The toolbar offers Bold, Italic, Underline, Link and Bulleted List. The message you write here is the body of the email.
Attachments
The Attachments column shows how many files are selected and their total size in its header (for example 3 selected · 1.2 MB). It contains:
- This Document: The document you are emailing, as a PDF. It is always attached and can't be unticked.
- On This Order: Other documents on the same order, grouped into Invoices, Inspections and Work Orders. Tick the ones to include.
- Asset Documents: Files for each asset on the order, such as spec sheets, operator manuals, marketing photos and dispatch inspection photos. Shown only if you have permission to view assets.
- Company Documents: Your organization's shared files, when there are any.
- Your Files: Drag files onto the drop area, or click browse, to attach files from your computer to this email only. Accepted types are .pdf, .png, .jpg, .jpeg, .gif, .webp, .heic, .doc, .docx, .xls, .xlsx, .csv, .txt, .ppt and .pptx, up to 10 MB each.
Inspections are attached as a PDF that never includes internal notes, so they can be sent to customer contacts.
INFO
Note: An email can go to at most 20 recipients and carry at most 20 attachments (the document itself included), with a total size of 18 MB.
Previewing and Sending
The footer summarises the email, for example 3 attachments · 1.2 MB · 2 recipients (2 emails).
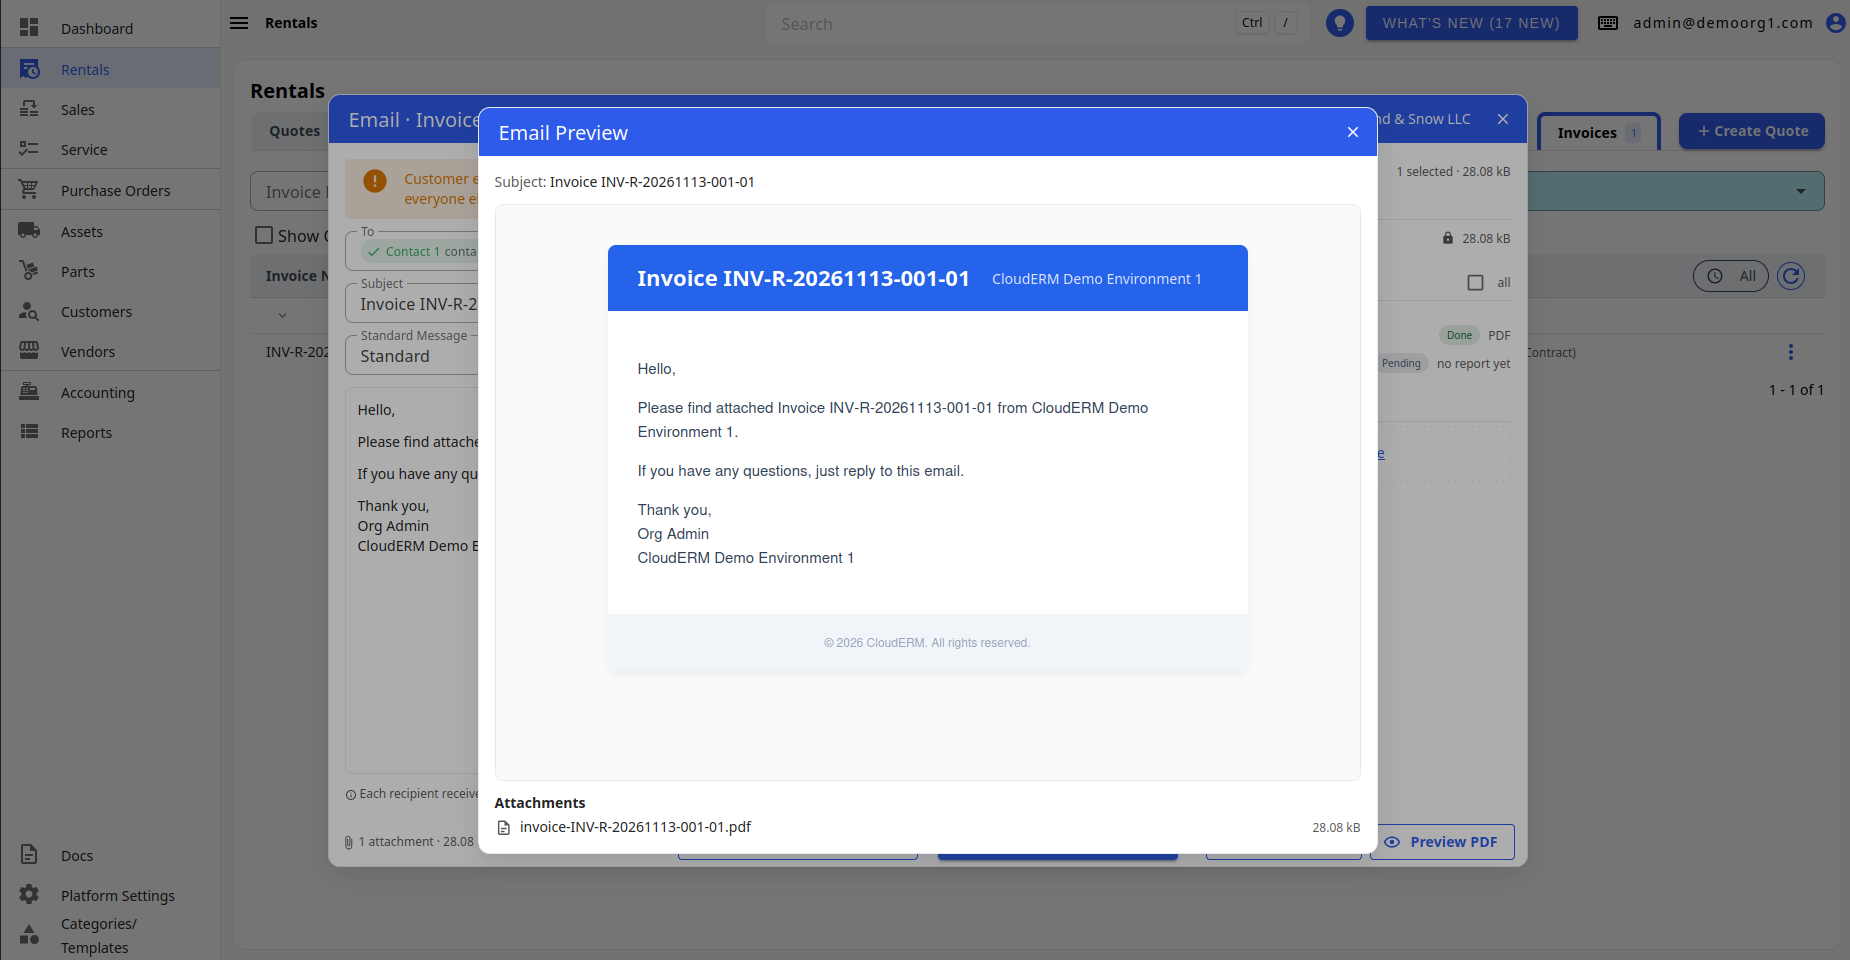
- Preview Email shows the email exactly as recipients will receive it, in your organization's branded layout, with its subject and list of attachments.
- Preview PDF opens the document's PDF in a new browser tab. For a work order, this is the customer copy.
Both preview buttons are hidden for an inspection that is still pending.
Click Send. A Send Email? prompt asks you to confirm, for example Send <document> <number> to 3 recipients, as 3 separate emails? (or the address, when there is only one recipient). Click Send to send it.
If some emails could not be delivered, the popup lists each address as Sent or Not sent with the reason.
Customer Email Settings
Customer Email Settings only control the emails the system sends automatically. Emails you send from the Email Composer always attach the document PDF and use the message you write.