Appearance
Scheduled Reports
Scheduled Reports email a report to you, and to other users you choose, on a regular schedule — for example a monthly equipment sales report on the first business day of each month. Each person gets the report as a file attached to an email.
INFO
Note: The Scheduled Reports tab is shown to users who have been granted the permissions for at least one report section (Service, Daily Summary, Platform, Accounting, Assets, Category, Fleet Margin, Customers, or Sales reports). It is not available to customer portal users.
Opening scheduled reports
Schedules are managed from your User Profile. Open the User Menu in the top-right corner, go to your profile, and click the Scheduled Reports tab (between Report Preferences and Filter Preferences).
Each user sees only their own schedules, and you can have up to 25 schedules. The profile's Save button is hidden on this tab — each schedule saves itself when you save it in its popup.
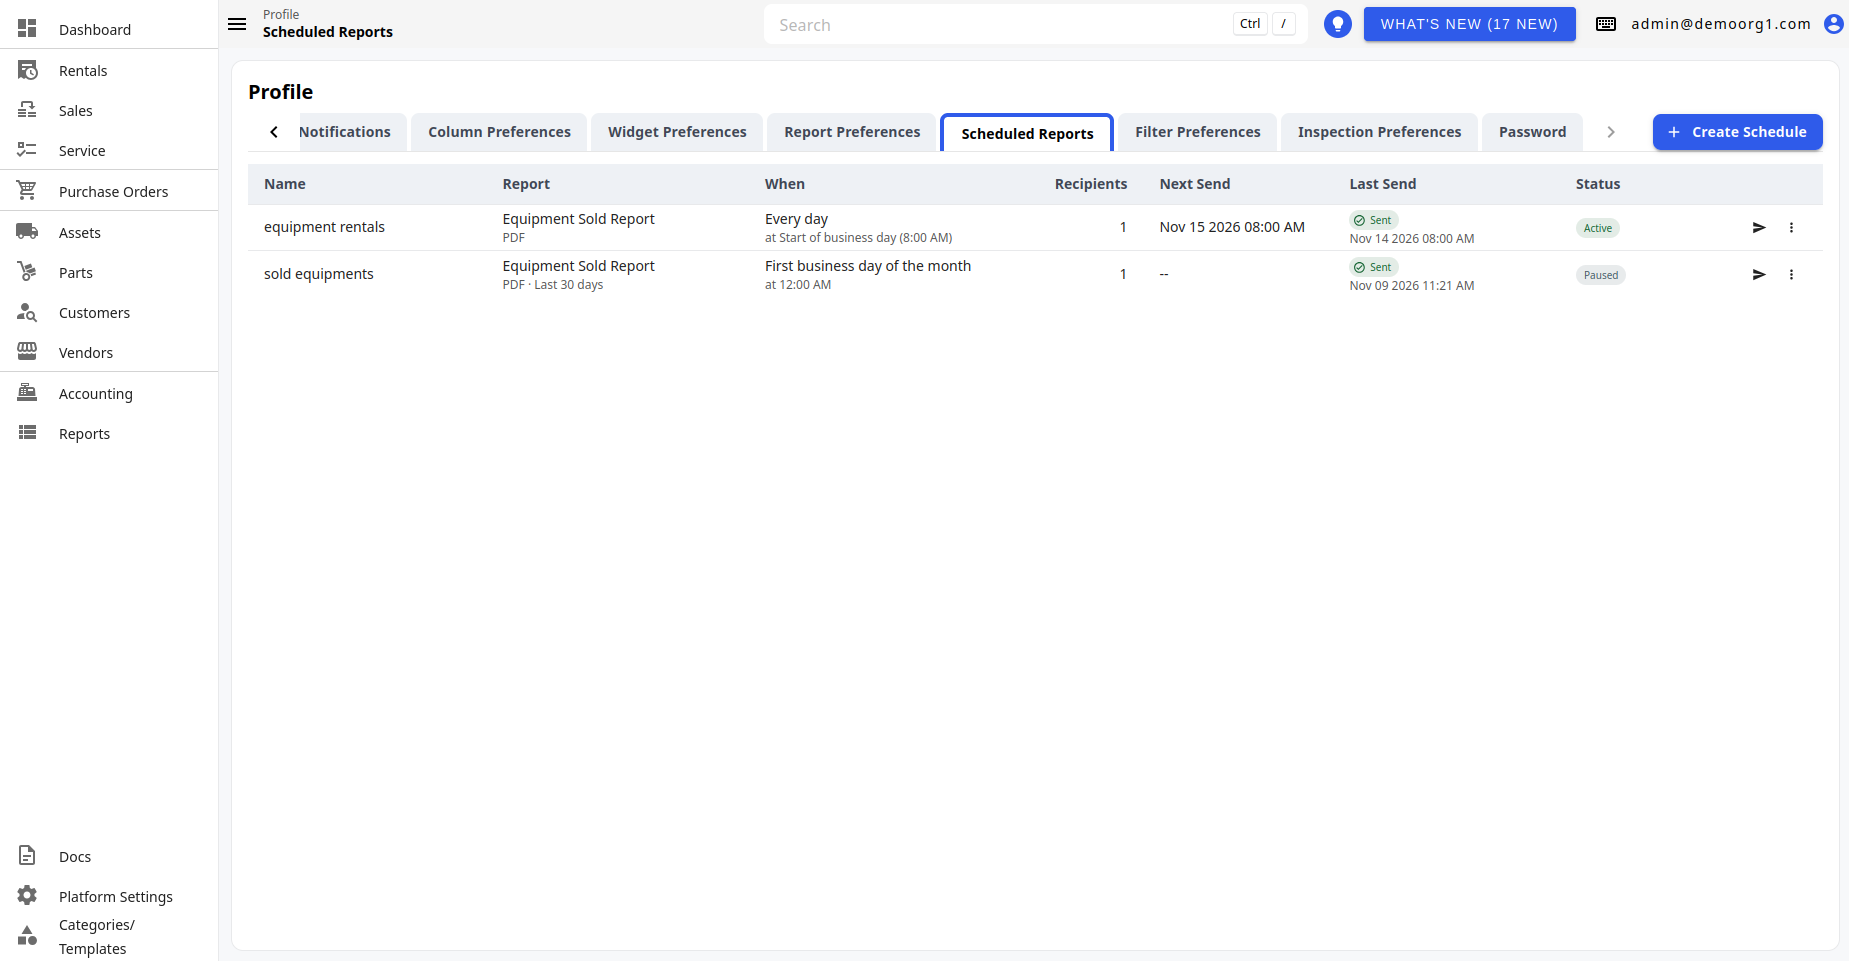
| Column | Description |
|---|---|
| Name | The schedule's name. |
| Report | The report that is sent, with its file format and date range underneath. |
| When | How often it is sent, with the send time ("at ...") underneath. |
| Recipients | The number of people who get the report. |
| Next Send | When the report will next be sent. |
| Last Send | The result of the last send — a Sending, Sent, Failed or Skipped chip — with its time, and any error in red. |
| Status | An Active or Paused chip. A schedule that paused itself shows the reason in orange underneath. |
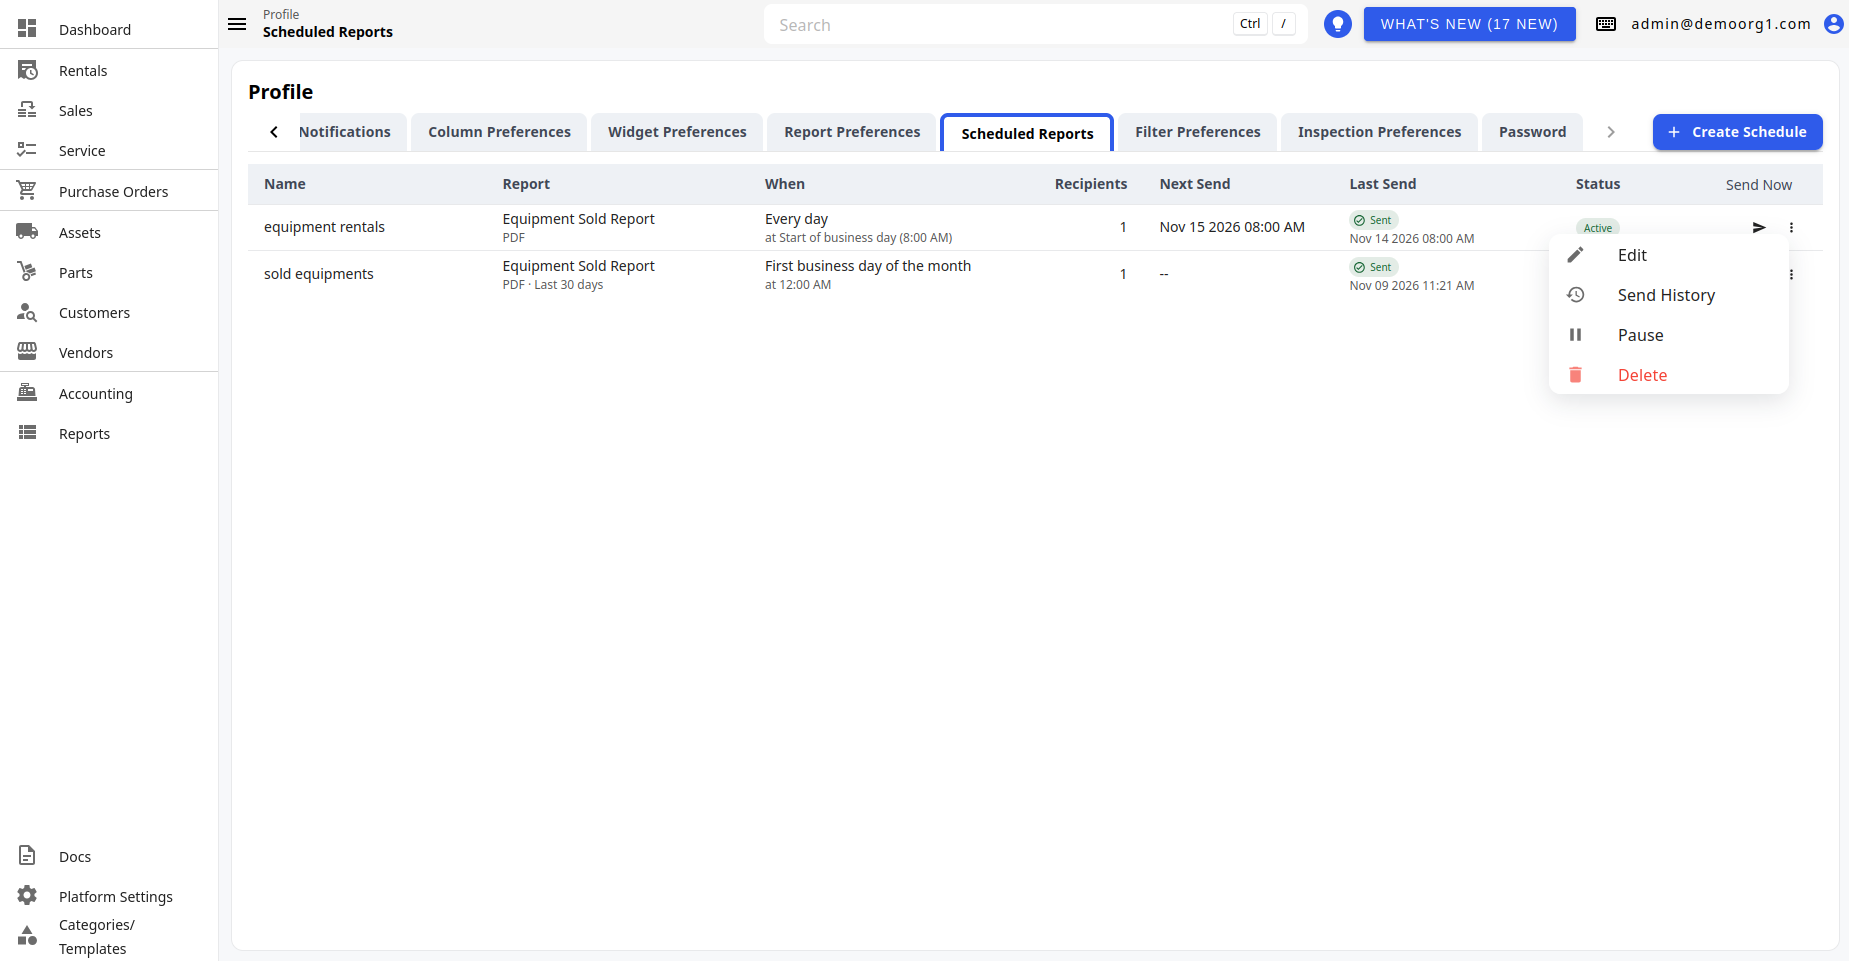
Each row also has a Send Now icon and an Actions (⋮) button. When you have no schedules, the tab shows "No scheduled reports yet".
- Click a row to edit the schedule.
- Right-click a row, or click its Actions (⋮) button, to open the actions menu:
- Edit — opens the schedule's popup.
- Send History — shows every send of this schedule (see Send history).
- Pause / Resume — stops or restarts the schedule.
- Delete — removes the schedule.
Creating or editing a schedule
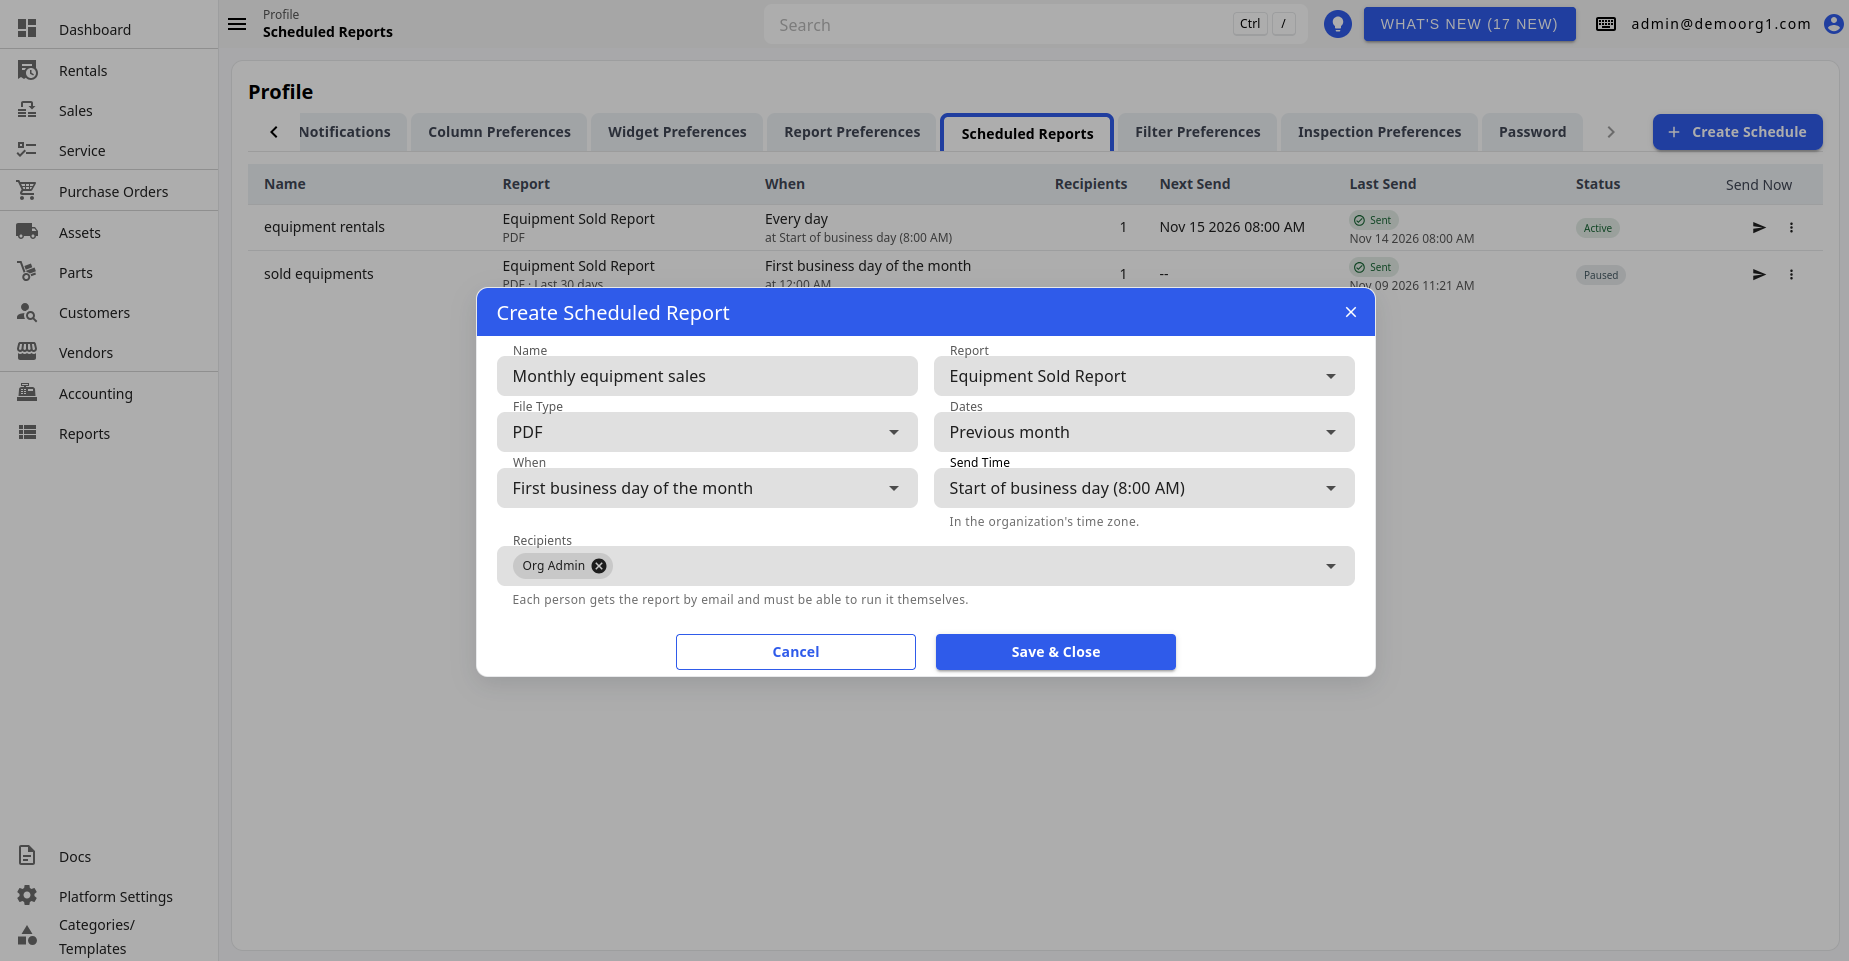
Click Create Schedule to open a new schedule, or click a schedule's row (or Edit in its actions menu) to change it.
| Field | Description |
|---|---|
| Name | Required. Up to 120 characters, and it must be different from your other schedules' names (for example Monthly equipment sales). |
| Report | The report to send. The list is searchable and shows each report's group underneath its name. Only reports you can run yourself are offered. Reports that only work for a single record (the Asset and Customer Information Sheets and the Customer Sold Assets report) and reports that can only be viewed on screen (such as Accounts Receivable) can't be scheduled. |
| File Type | The file format to send, from the formats that report can produce (for example Excel, CSV, PDF or IIF). |
| Dates | Only for reports that cover a date range. The period each send covers: Report default, Today, Previous day, Last 7 days, Last 30 days, Last 90 days, Week to date, Previous week, Month to date, Previous month, Quarter to date, Previous quarter, Year to date, or Previous year. |
| When | How often the report is sent: Every day, Every business day, First business day of the week, Last business day of the week, First business day of the month, Last business day of the month, or 1st of the month. |
| Send Time | Start of business day or End of business day (each shows its time), or any half hour from 12:00 AM to 11:30 PM. Times are in the organization's time zone. |
| Recipients | 1 to 20 users; defaults to you. Each person gets the report by email and must be able to run it themselves. |
Click Save & Close to create the schedule (or Save when editing), or Cancel to close without saving.
- The business day start and end times, and which days count as business days, are set by your organization in Platform Settings › General › Business Hours.
- If you don't have permission to view users, the Recipients picker is replaced by a line of text: "Sent to you only." on a new schedule, or "Sent to N recipient(s)." when editing one.
- If a recipient can't run the report, saving is refused and the message tells you who and why.
- Report filters can't be chosen yet — the report runs with its default filters.
Send Now
Click a row's Send Now icon to send the report straight away. Send Now:
- works on paused schedules too;
- doesn't change the Next Send time;
- can't be clicked again while a send is still running, or twice in the same minute.
When it finishes, you see "Scheduled report sent", or "Scheduled report could not be sent: <reason>". The failure message stays on screen until you close it.
How reports are delivered
- Each recipient gets their own email with the report file attached. The subject is the schedule name followed by the report name, for example Monthly equipment sales: Equipment Sold Report.
- The report is run with the access of the schedule's owner.
- Reports usually arrive within a few minutes of the send time.
- If sending was interrupted for a while (for example during an outage), you get one catch-up email once sending resumes, not one for every send that was missed.
Paused schedules
Click Pause in a schedule's actions menu to stop it, and Resume to start it again. A resumed schedule continues from its next send time — sends missed while it was paused are not sent.
A schedule also pauses itself, and shows the reason under its Paused status, when:
- the report no longer accepts the schedule's settings;
- the schedule's owner loses access to the report or is deactivated;
- the report or the chosen file format can no longer be scheduled;
- none of the recipients can still receive the report; or
- the report file is larger than 20 MB.
Fix the cause (for example, edit the schedule), then click Resume.
Deleting a schedule
Click Delete in a schedule's actions menu. A message "Schedule '<name>' deleted" appears with an undo option. The schedule is only deleted once that message closes, so you can undo the delete until then.
Send history
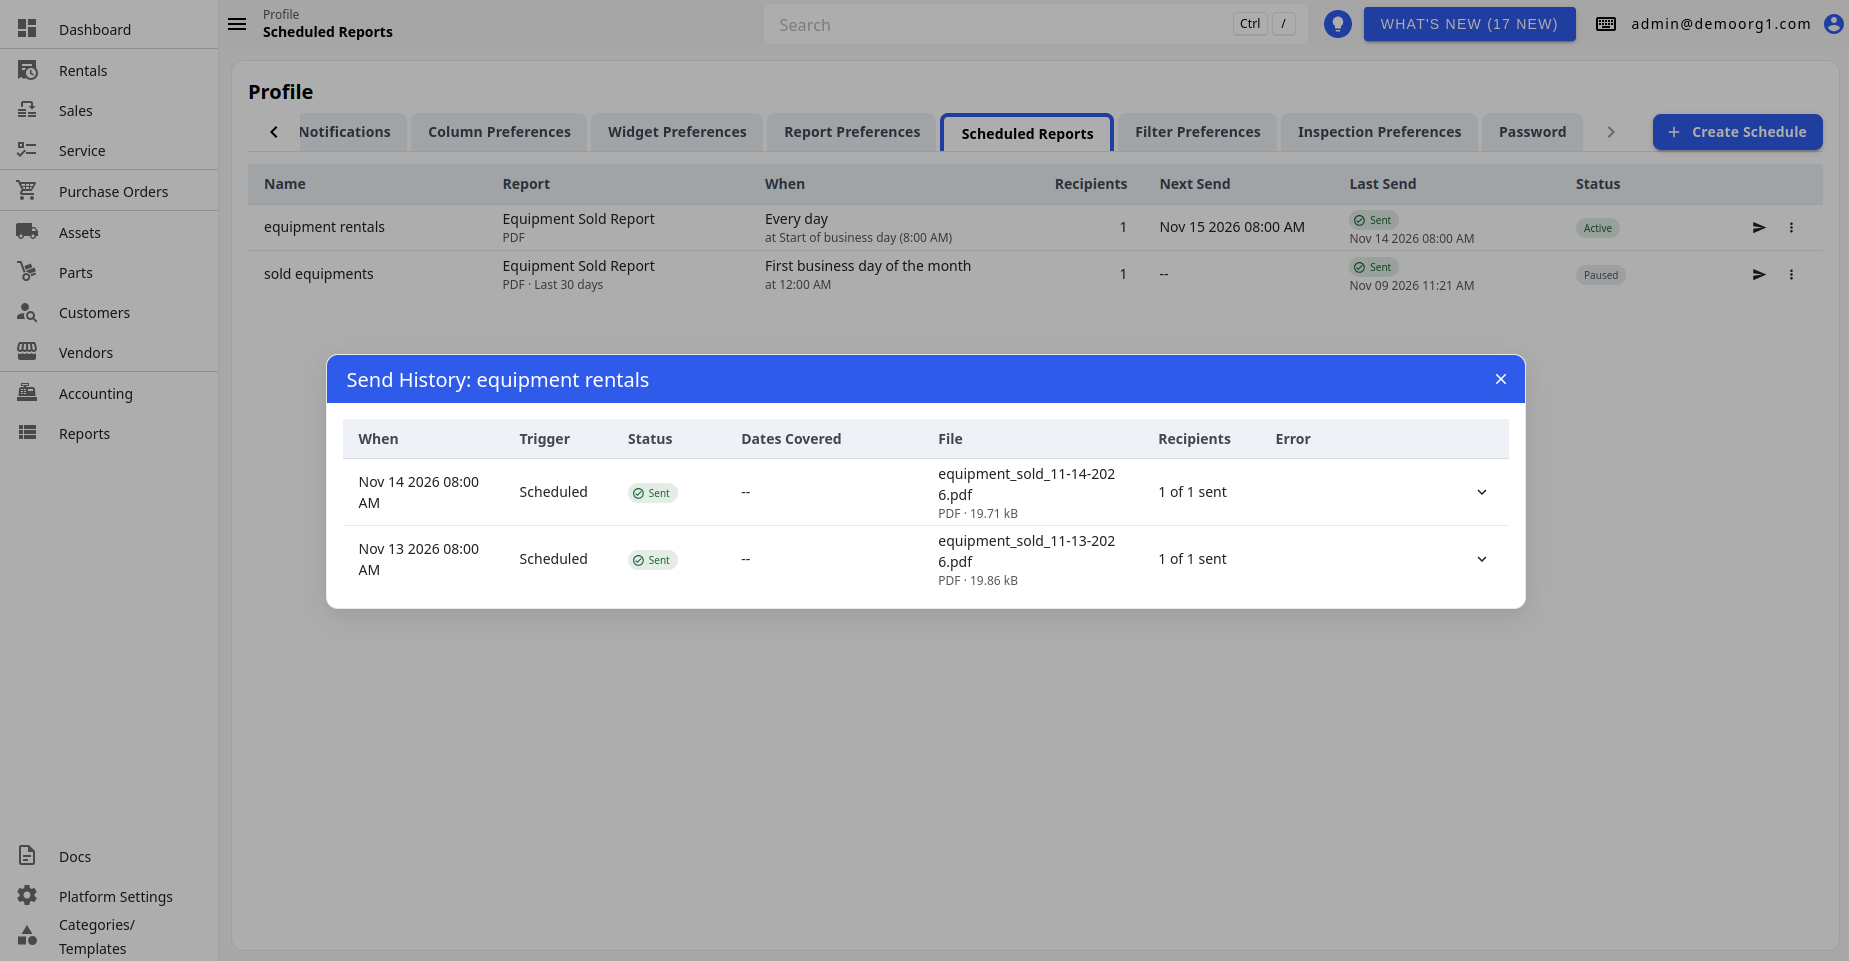
Click Send History in a schedule's actions menu to open Send History: <name>, which lists every send of that schedule:
| Column | Description |
|---|---|
| When | When the report was sent. |
| Trigger | Scheduled, or Send Now when it was sent by hand. |
| Status | The result of the send. |
| Dates Covered | The date range the report covered. |
| File | The file's name, format and size. |
| Recipients | How many recipients it reached, for example "2 of 3 sent". |
| Error | Why the send failed, if it did. |
Expand a row to see each recipient: Sent, Not sent: <reason>, or Left off: <reason> for a recipient who was left out of that send. When the schedule hasn't sent anything yet, the popup shows "Nothing sent yet".
See Viewing and Generating Reports for running a report on demand.